
What is Google Tag Manager and how to set it up?
Google Tag Manager is a system that allows you to insert tracking tags, indicators, and other data collection elements on your website without the need to edit the code. These tags are then used by Google Analytics. What Google Tag Manager does:
- Inserts tracking markers on your website.
- Gathers information on how people interact with your site.
- Tracks conversions from visitors to customers.
- Adds analytics to your website.
- Enables the activation of specific page features without editing the code.
Collecting data using tools like Google Analytics 4 is crucial for expanding your business’s online reach, converting potential customers into clients, and optimising your digital marketing strategy to build stronger connections with your audience.
However, data collection is easier said than done. Google Analytics and similar analytical tools facilitate the process, but they work most effectively when accompanied by the use of tags.
Enhance your website with effective technical SEO. Begin by conducting an audit.
What do Google tags represent?
Tags, in a general sense, are pieces of code that you embed into the JavaScript or HTML of your website to extract specific information.
For marketing professionals, the information necessary for tags typically includes how long users visit your site, form submissions, how they arrived at your site, which links they clicked on, or even what products they removed from their shopping cart.
Each tag tracks something different. For example, you can create a tag solely to see how many people are filling out the contact form on your “Contact Us” page. Then, this tag can send more precise information to Google Analytics, Google Ads, or another third party.
Unfortunately, manually coding tags can be a tedious and challenging process for marketers without much coding knowledge or experience, and requesting IT department queries can take up a lot of time.
With Google Tag Manager, your entire tagging process becomes much easier. All you need to do is embed the code into your website’s pages once, and then every time you want to create a tag, Google Tag Manager codes it and embeds it for you.
Google Tag Manager is a tag management system that allows you to create and monitor tags through a user interface without having to write new code each time you want to create a tag. You simply embed the Google Tag Manager code into every page of your website. This eliminates the manual tag creation process, making your marketing efforts more efficient and precise.
Google Tag Manager accomplishes several things: first, it allows your developers and IT department to focus on larger-scale tasks by eliminating the burden of coding each individual marketing tag.
Second, because Google Tag Manager codes the tags for you, it significantly reduces the potential for human error.
Third, Google Tag Manager empowers your marketing department to take full control over the tags they create and monitor. Granting your marketers complete authority over their tags enhances efficiency. Additionally, using tags improves the accuracy of your analytics system, ensuring higher-quality reports and a better understanding of your actual online audience.
With everything said so far, this is still a tool you might want to try out for yourself before deciding if it’s a perfect fit – perhaps you already have an established tagging system, or you don’t feel the need for this level of organisation, as your website usually doesn’t require new tags.
Google Tag Manager is free, so you can practically try it out without risk. Here, we’ll show you how to set up an account, create a new tag, use Google Tag Manager with your Google Analytics account, and integrate the tool into WordPress.
Afterward, you can decide for yourself if this is the right system for your business.
How to set up Google Tag Manager
Creating and setting up an account
Creating a free account is an easy two-step process but is separate from any of your other Google Analytics or Gmail accounts. To ensure a seamless setup for you, we’ve documented our account creation process.
Here’s how it’s done step by step:
- Account registration
Go to Google Tag Manager and click on the green “Sign Up for Free” button. It will prompt you to enter your account name (company), country, and website URL, as well as where you want to use Google Tag (web, iOS, Android, AMP). When you’re ready, click the blue “Create” button.
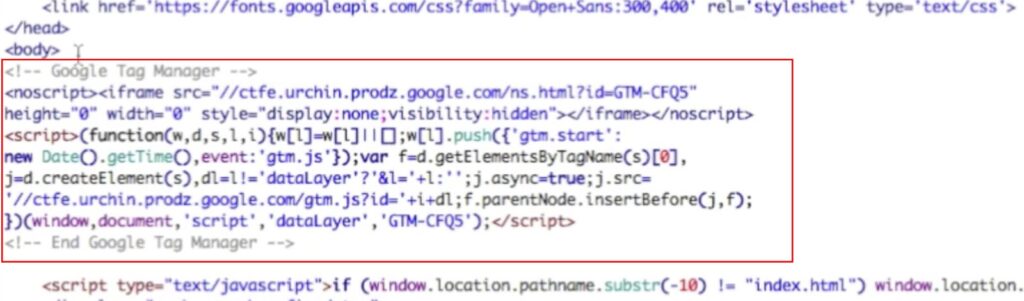
- Follow the instructions for adding code
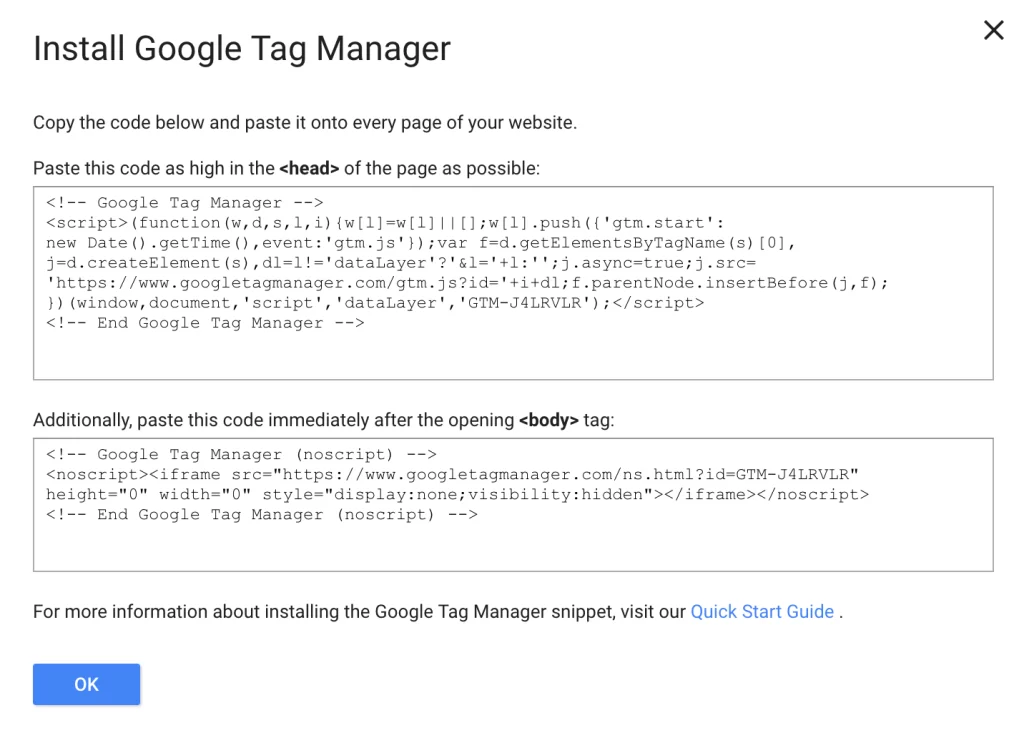
Next, you will be provided with codes and instructions for including the code in the <head> of your website and another after the opening <body> tag. You can do this now or add the codes to your site later (they are available in your management dashboard). Once you’re ready, click “Ok.”
Setting up a tag (Label)
Once you have an account in Google Tag Manager, the first thing you’ll want to learn is how to set up a tag.
You can create unlimited tag configurations in Google Tag Manager.
This is useful for creating in-depth reports on your audience’s behavior, but it can become ineffective if you don’t organise your tags correctly.
Google recommends using the following naming convention: tag type – application name – detail.
You can name one tag configuration “AdWords Conversions – iOS – Campaign 2023-02” and another “Google Analytics – CP – About Us Page.”
This way, you can correctly identify and collect data related to specific campaigns or pages.
For example, the second tag, “Google Analytics – CP – About Us Page,” shows you how well your “About Us” call-to-action button is performing. This information is important and could be lost if you name your tags more generically, like “CTA Button.”
Now, after clarifying that, let’s see how to set up a tag:
1. Create a new tag in the Google Tag Manager dashboard.
In the Google Tag Manager dashboard, click on the “Add a new tag” button, circled in red below.
2.Configure your tag.
Give your tag a title, and then click somewhere in the “Tag Configuration” field at the top to select the tag type.

3. Choose the tag type.
There are dozens of tag types (not all are shown here, and you can also customise tag types). I chose “Classic Google Analytics.”

4. Connect your tag to Google Analytics.
If you want your tag to be tracked in Google Analytics, the next step will be to enter the identifier of your web property, which can be found in your Google Analytics account. Then select the “Track Type.” I chose “Page View,” but there are many other options.
5. Choose a trigger to determine when the tag is fired.
Next, select a trigger (trigger means when you want the tag to be fired, i.e., “every time someone visits the page”). I chose “All Pages” to receive information every time someone views any of my web pages, but this may vary depending on your goals. Once you are satisfied with the information in the “Tag Configuration” and “Triggering” fields, click the blue “Save” button.
6. Save your tag.
When you are satisfied with the information in the “Tag Configuration” and “Triggering” fields, press the blue “Save” button.

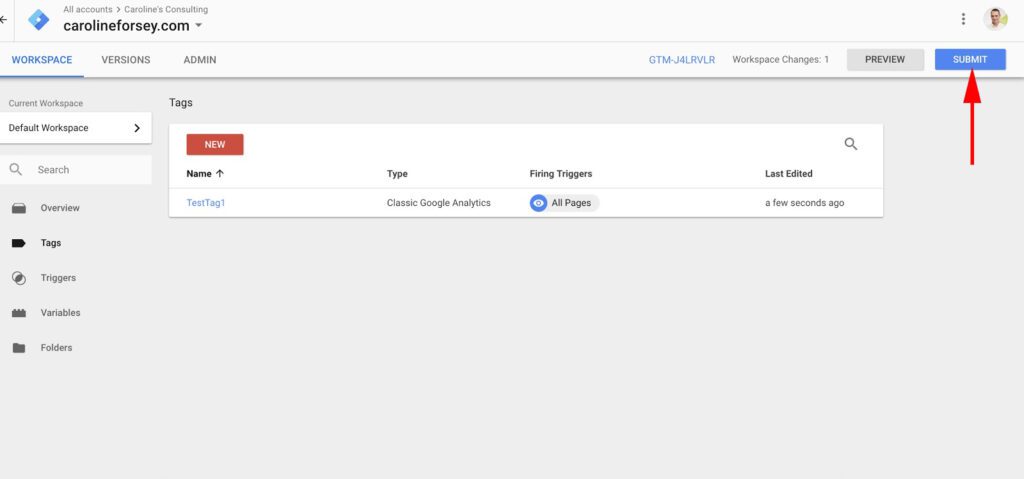
- Activate your tag by clicking “Submit.”
Then click the blue “Submit” button. Your tag won’t work until you do this.
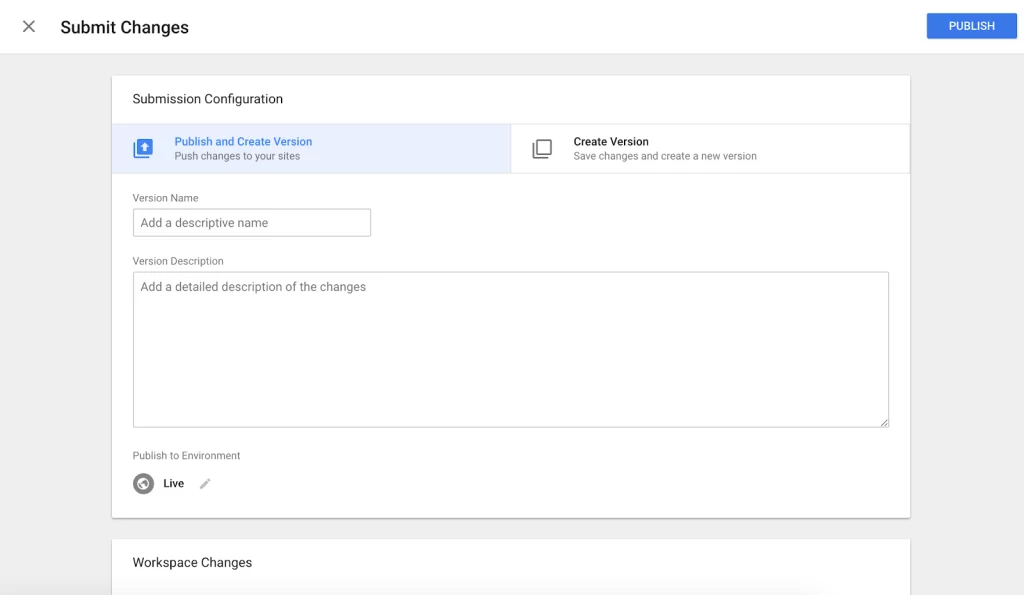
When you click “Submit,” you will be taken to the “Submission Configuration” page. There are two options: “Publish and Create version” or “Create version.” Since I’m ready to launch the tag on all pages of my website, I chose “Publish and Create version” and then clicked the blue “Publish” button in the upper right.
8. Add names and descriptions to your tags to keep them organised.
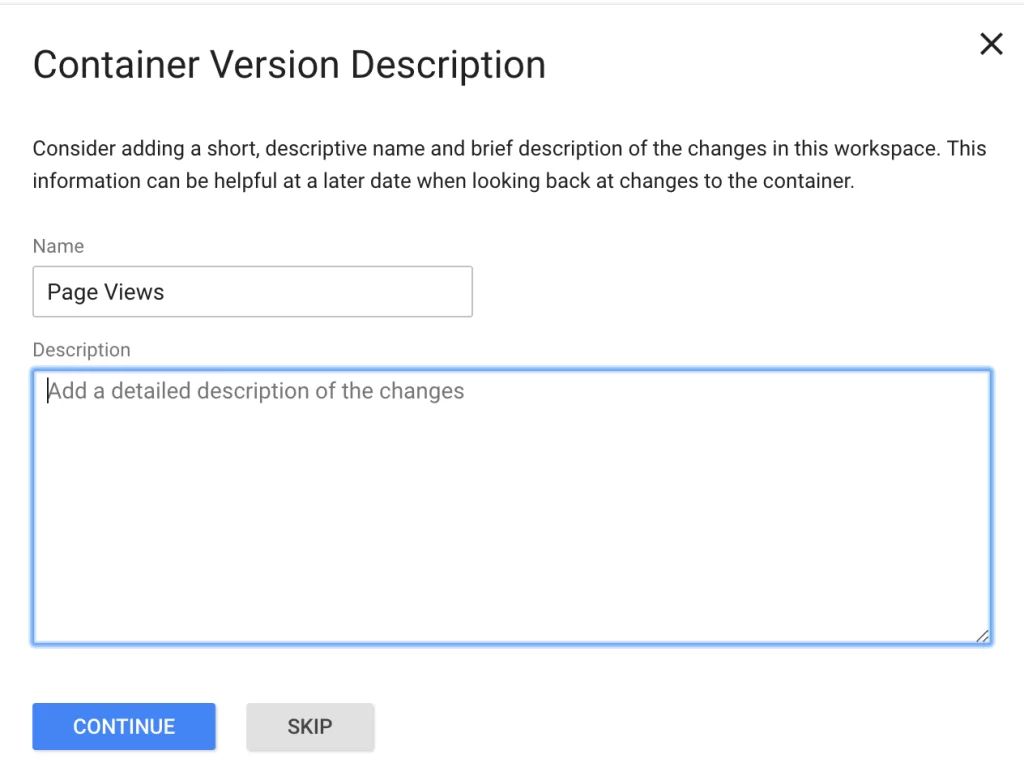
Finally, you will see this “Container Version Description.” To keep your tags organised, add names and descriptions to understand what you are trying to record with this tag.
9. Ensure your tag appears in your “Version Summary” report.
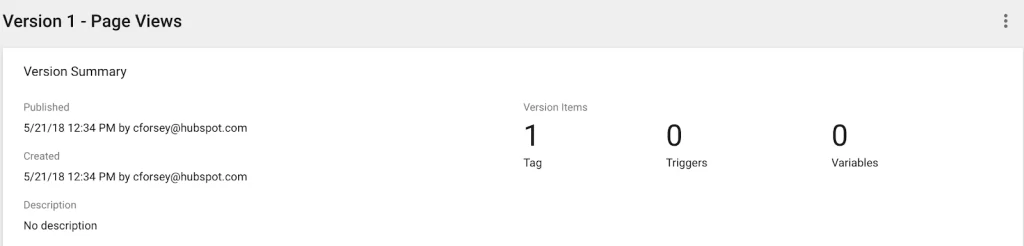
You have now successfully created your first tag.
Google Tag Manager and Google Analytics
If you want to use Google Tag Manager in conjunction with Google Analytics, there are a few steps you’ll need to take. However, the effort is worthwhile – embedding tags into your site will increase the accuracy of your reports in Google Analytics.
First, you’ll need to remove your GA code from the pages of your site. You’ll only need the embedded code of Google Tag Manager – if you use both, it will simply report everything twice and confuse your data.
Second, you’ll probably want to create a variable for your tracking ID in Google Analytics. The variable is a Google Tag Manager tool designed to enhance your efficiency by storing additional (optional) data that you provide.
By recording your GA tracking ID as a variable, you won’t have to look for it every time you create a new Google Analytics tag (which makes the lazy person in me very happy).
How to create a variable in Google Tag Manager
1. Click on “Variables” on the Google Tag Manager home page.
2. Under “User-Defined Variables,” click “New.”
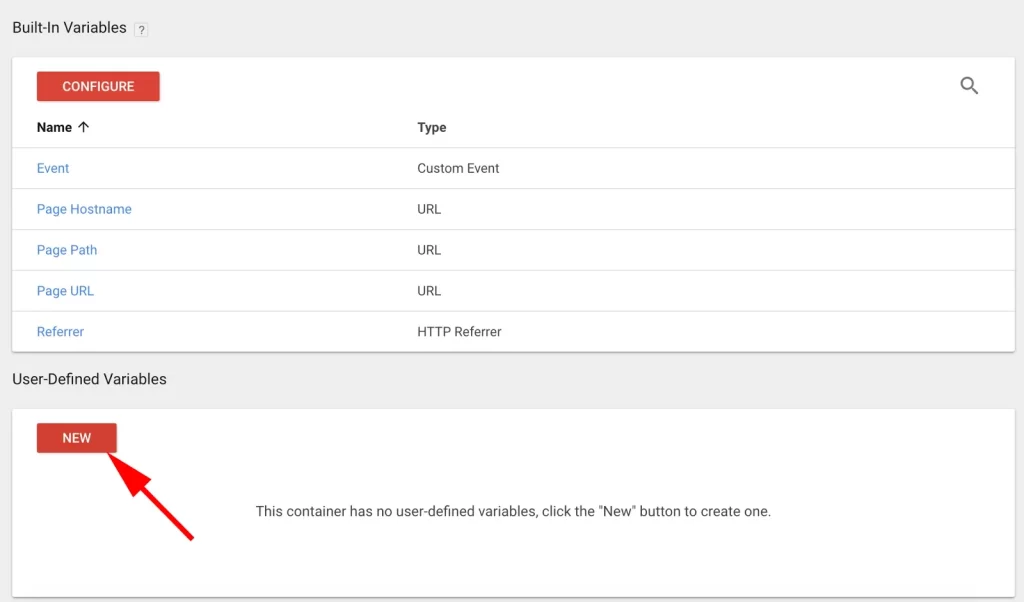
3. Name your variable.
I named it “GA Tracking ID” for easy recall. Then, click on the “Variable Configuration” field.
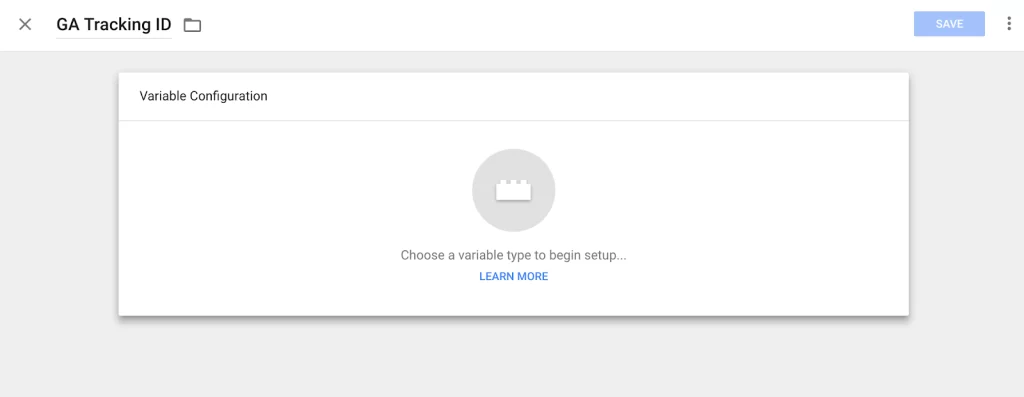
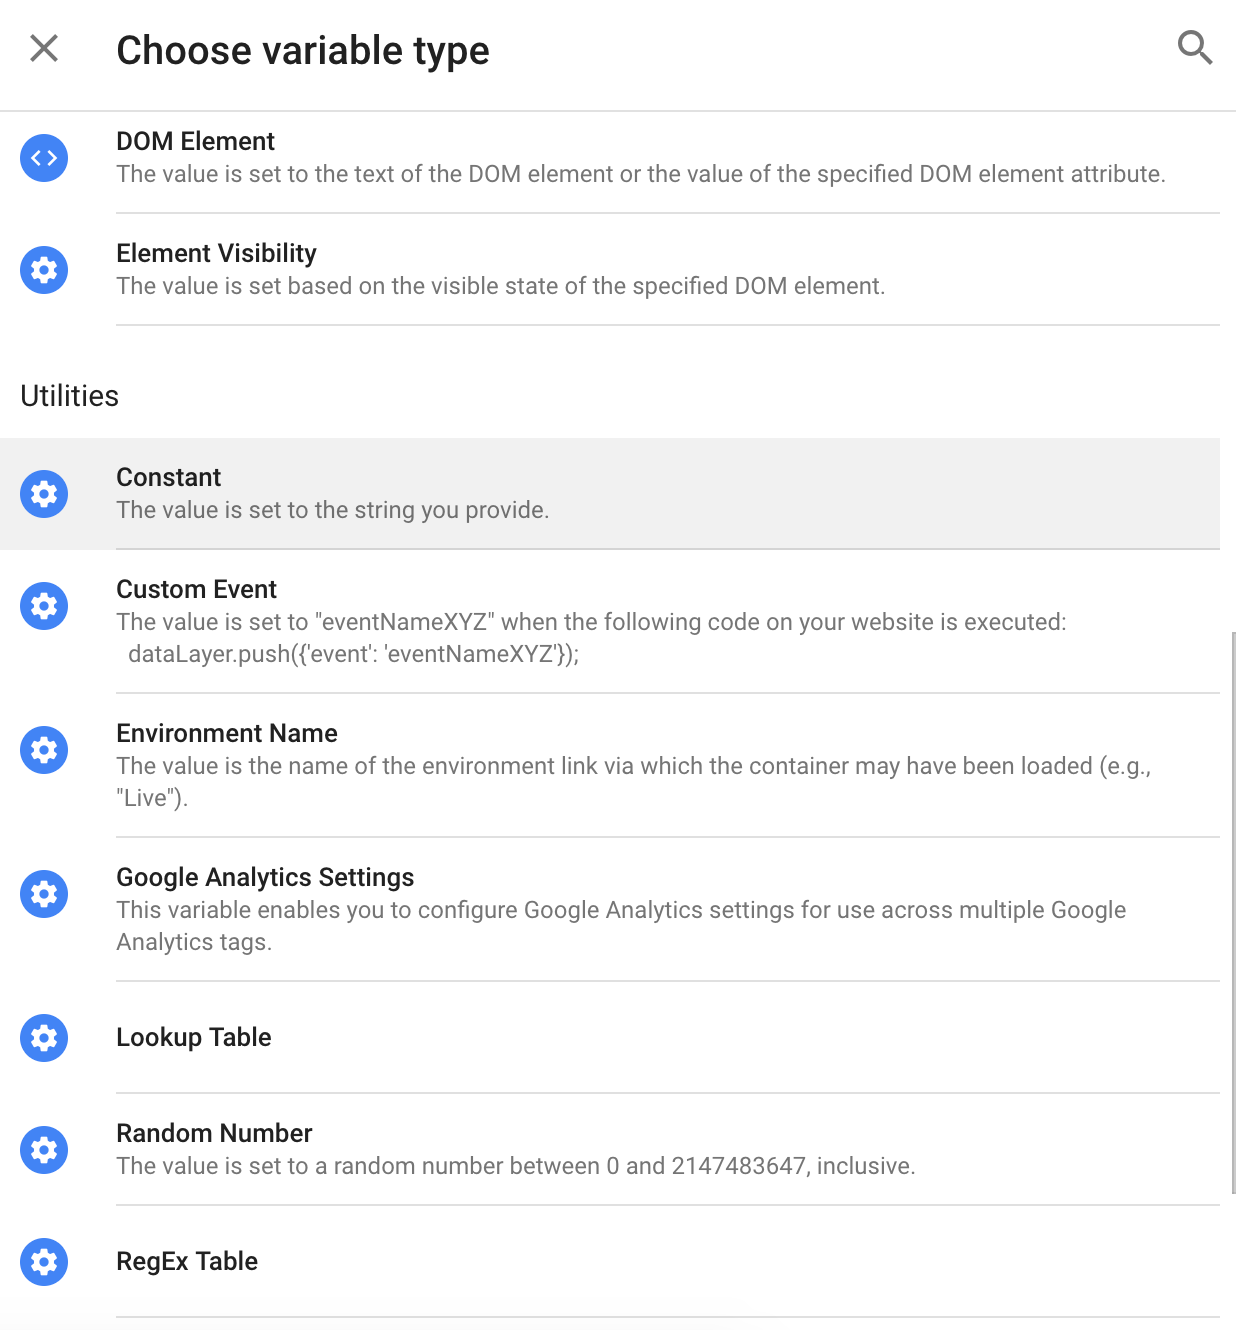
4. Select the variable type.
Choose “Constant” as the variable type since you don’t want the ID to change for different tags.
5. Save your settings.
Now, input your Google Analytics tracking ID in the “Value” field and select “Save” in the upper right corner.

Next, let’s edit our “TestTag1” created earlier in this post and include the new variable you just created.
How to edit a tag and change its value
1. Select the tag to edit.
Go back to your home page, select “Tags” from the sidebar. Click on the tag you want to edit (I clicked on “TestTag1”).
2. Click on the grey “+” icon next to the “Web Property ID” field.
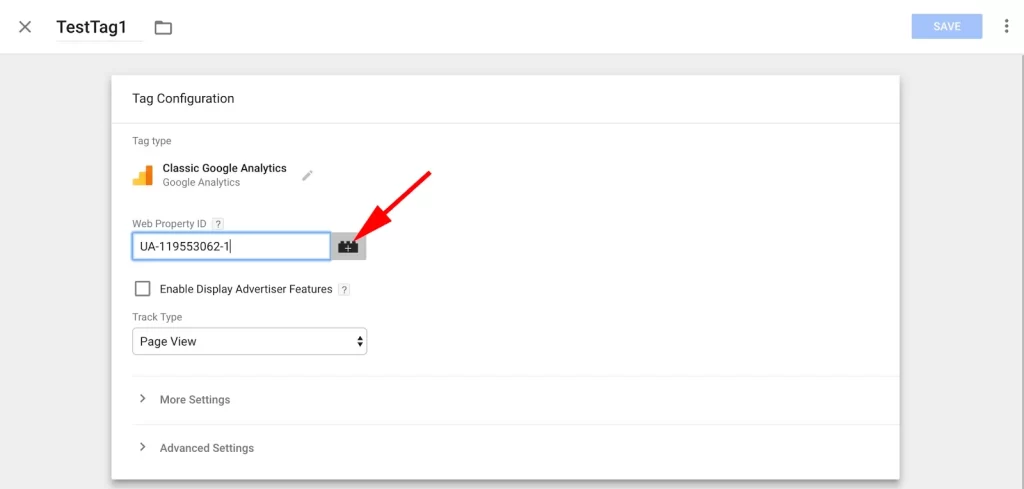
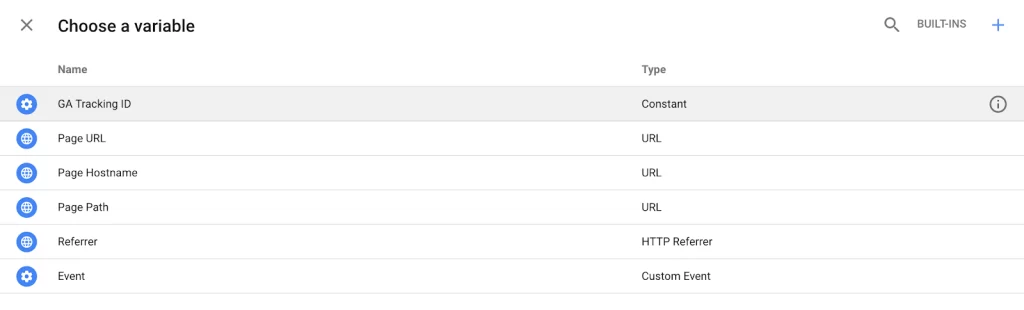
3. Edit the variable.
A field labelled “Choose a variable” will appear, and the first option, “GA Tracking ID,” is the variable you just created. Select that.
4. Click Save.
Now, in your “Web Property ID” tag, you should see the name you gave to your variable. Click Save, and your tag is updated.
Google Tag Manager for WordPress
If you’re using WordPress for your website, there’s an easy two-step process to integrate Google Tag Manager into WordPress.
There are plugins available, and if you’ve paid for the business version of WordPress, like Google Tag Manager by DuracellTomi.
However, if you prefer to do it manually, it’s relatively straightforward. It can get tedious only if you have many different pages on your site and want to use tags on all of them – you’ll have to copy and paste the code under the <body> tag of each page.
Here are the steps to follow:
1. Copy your tag manager code.
Copy the Google Tag Manager code you were given during the setup process. If you’ve already set up your account, click on the blue “Google Tag Manager” code next to “Workspace Changes” on the Google Tag Manager’s home page (highlighted in red below). This blue code will provide you with your specific Google Tag Manager code.

2. Install the code in WordPress.
Now, paste this code under the <body> tag on each page of your WordPress website.
Your WordPress site is now ready for any tags you want to create in Google Tag Manager. Google Tag Manager will automatically encode future tags and embed them in the page you’ve chosen.
If you encounter difficulties or lack the required knowledge, feel free to contact us for assistance in configuring and tracking your goals.