First, go to the WP Rocket website and purchase the WordPress plugin.
Choose the plan that works best for you and follow the necessary steps to place your order.
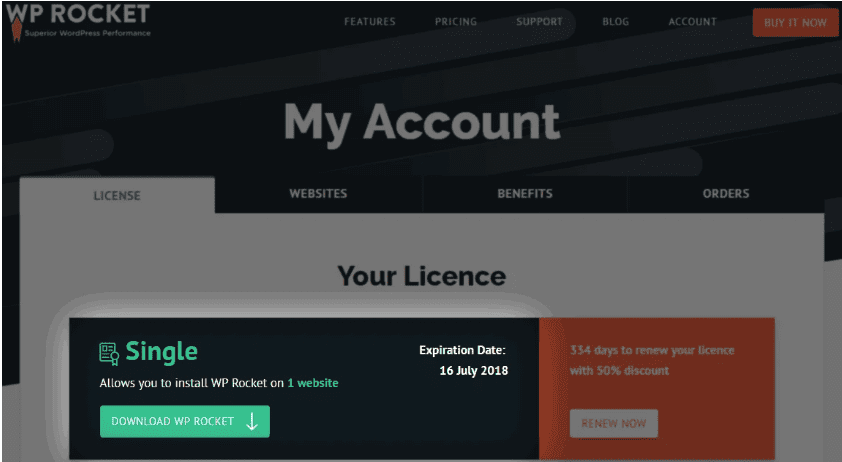
Next, you will receive an email with login information for your wp-rocket.me account. Go ahead, log in, and in “My Account,” you will find the download link. Download and save the plugin’s zip file to your computer.
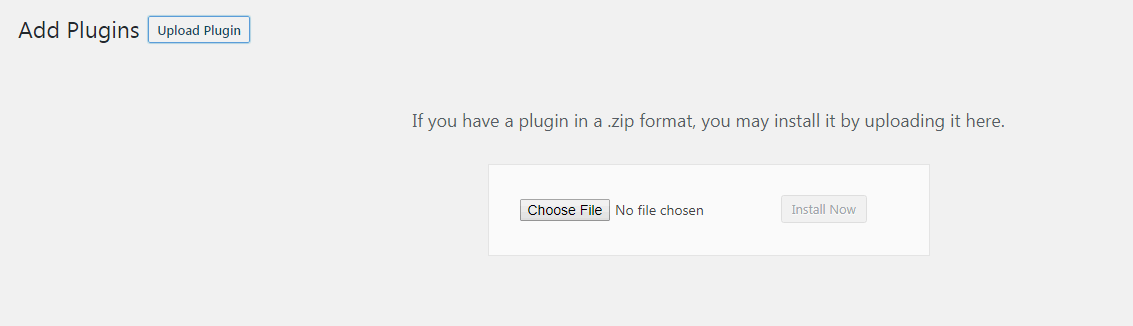
Then, log in to your WordPress site and go to Plugins –> Add New –> Upload Plugin.
Simply upload and install the zip file version of WP Rocket.
Finally, go and activate WP Rocket, and the plugin is now installed.
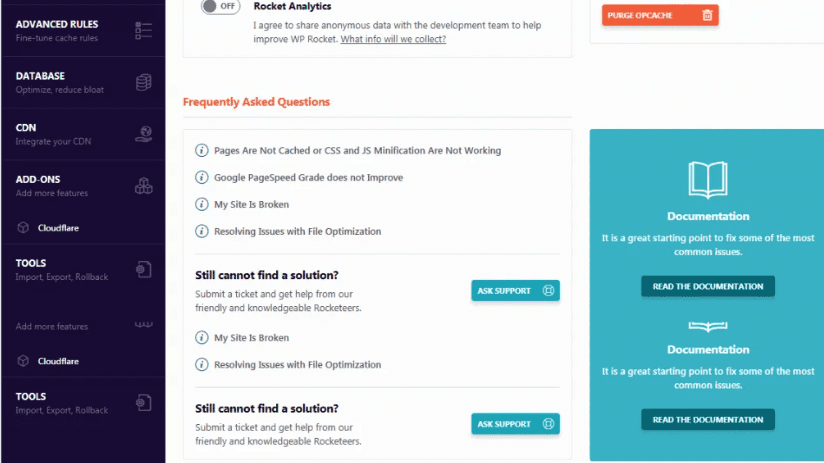
The dashboard provides information about your license and its expiration date. You can also opt to become a Rocket Tester (beta testing program) and enable Rocket Analytics (allow WP Rocket to collect data anonymously). Here, you will find links to support and frequently asked questions about WP Rocket.
In the dashboard, you can clear all cached files (recommended to do when you finish configuring WP Rocket settings), start cache preloading (generates cache for your homepage and all internal links on the homepage), and clear OPcache content (clears OPcache, preventing issues when updating the WP Rocket plugin).
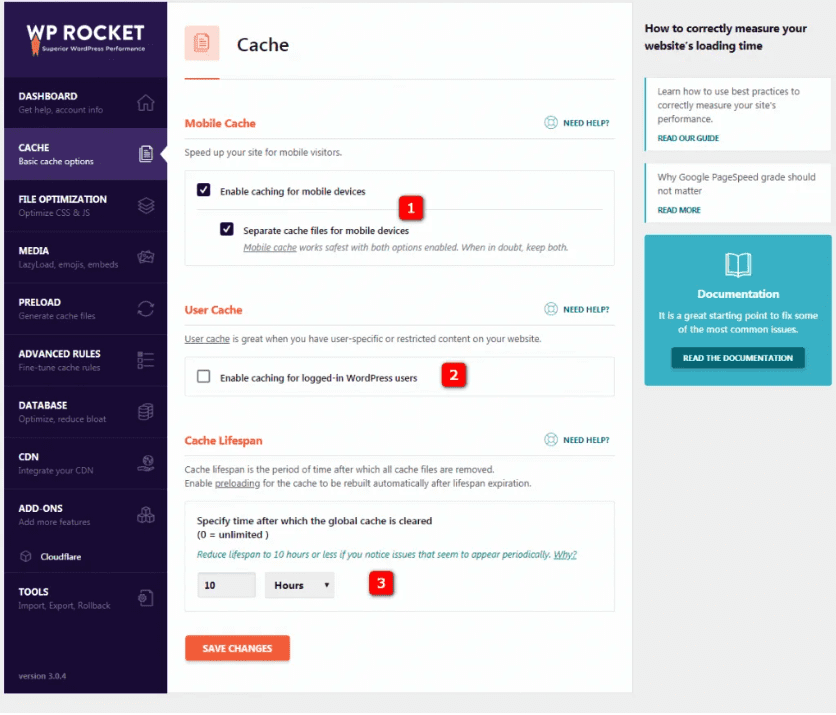
1. Enable caching for mobile devices should be enabled as it allows caching for mobile devices and makes your website more mobile-friendly.
Also, select Separate cache files for mobile devices since WP Rocket’s mobile caching works most safely with both options enabled. When in doubt, keep both enabled.
2. Enable caching for logged-in WordPress users, recommended to be activated only when you have a membership site or similar, where users need to log in to view content.
3. Cache Lifespan is automatically set to 10 hours, meaning cached files are automatically removed after 10 hours before being recreated. If you rarely update your site or have a lot of static content, you can increase this.
Save and test carefully! Deactivate settings if you notice anything broken on your website.
Important: Before starting these settings, make a backup for your website!
Minifying files reduces the file size and can improve loading times. Minification removes spaces and comments from static files, allowing browsers and search engines to process HTML, CSS, and JavaScript files faster.
File concatenation will link files into smaller groups to ensure theme/plugin compatibility and better performance. However, it is not recommended to forcefully concatenate into only 1 file, as browsers download up to 6 smaller files in parallel faster than 1-2 large files.
Concatenating CSS and JS into fewer files is considered best practice for HTTP/1, but this may not necessarily be the case for HTTP/2. If your site runs on HTTP/2, here are things to consider when configuring WP Rocket for HTTP/2.
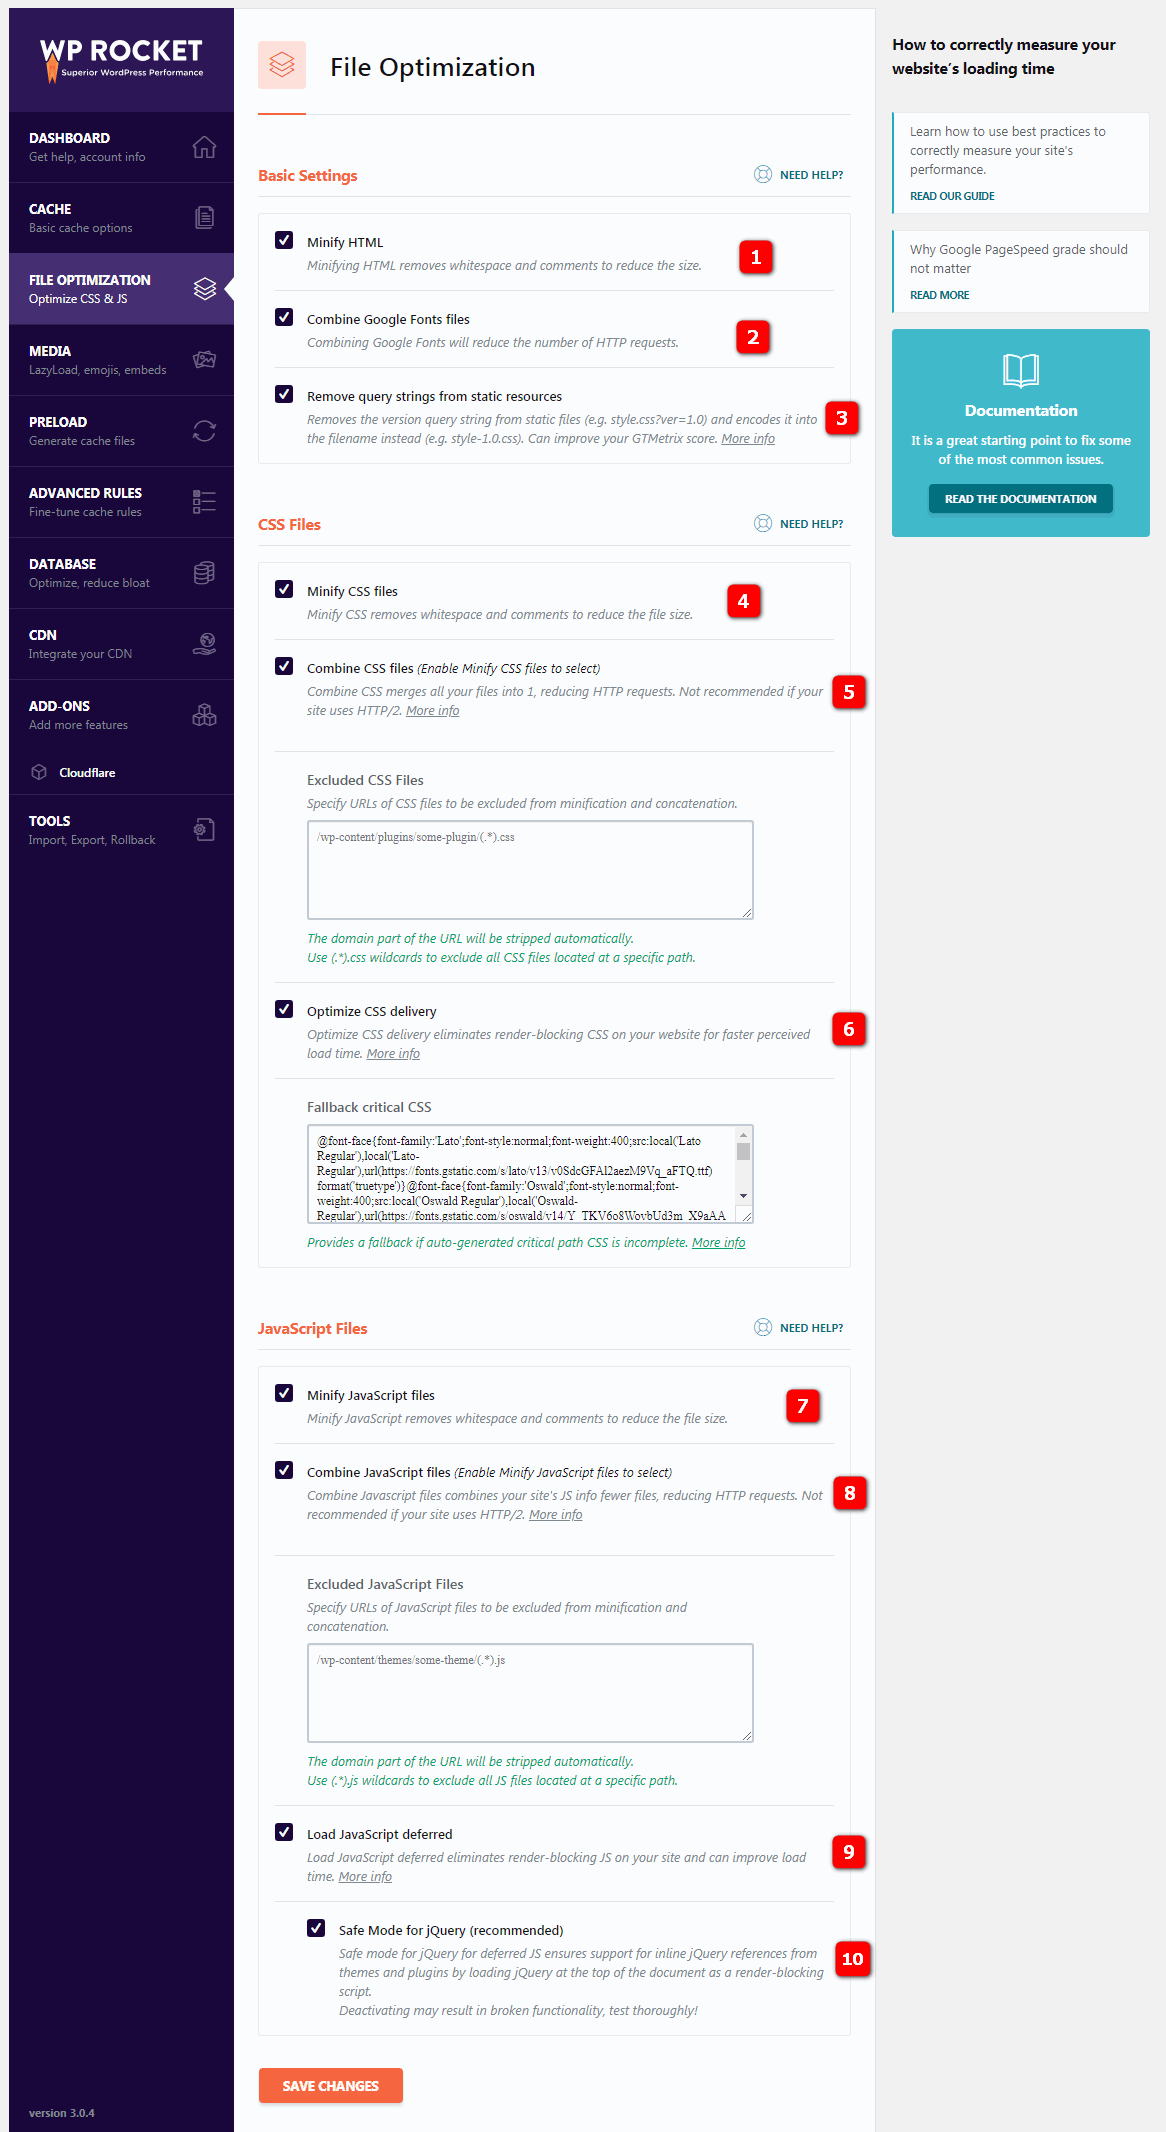
1. Minifying HTML files removes white spaces and comments to reduce the size of your website’s pages.
2. Concatenating Google Fonts files will reduce the number of HTTP requests, especially if you use multiple fonts.
3. Removing query strings from static resources can improve GT Metrix performance scores. This setting removes the query string for the version from static files (e.g., style.css?ver=1.0) and encodes it in the file name (e.g., style-1-0.css).
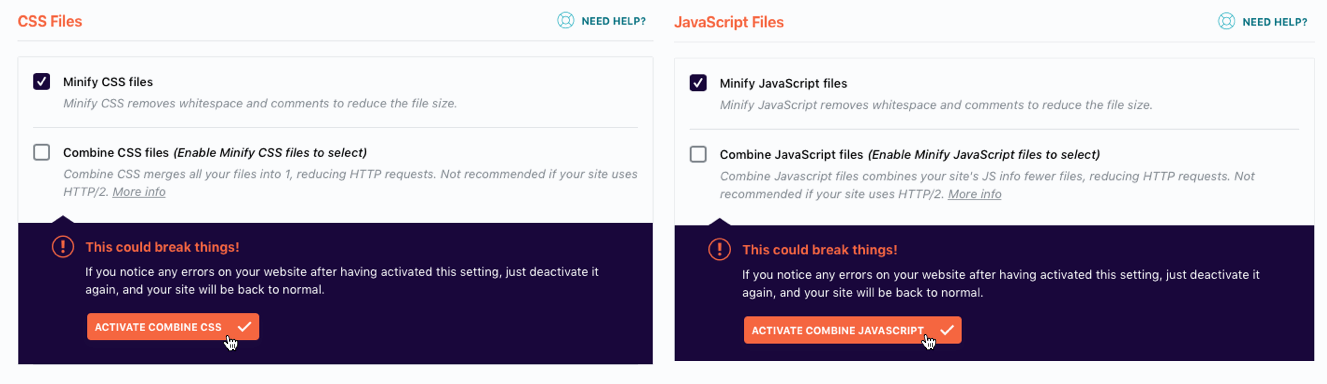
4. Minifying CSS files removes white spaces and comments to reduce the size of the stylesheet file.
5. Concatenating CSS files combines all your files into one, reducing the number of HTTP requests. Not recommended if your site uses HTTP/2.
Important: This can break things! If you notice any errors on your website after activating this setting, simply deactivate it, and your site will return to normal.
6. Optimise CSS delivery eliminates render-blocking CSS on your website for faster perceived loading time. This means your page will start loading without CSS styles, something Google PageSpeed Insights considers when “evaluating” page speed.
Critical Path CSS means your page will start loading without all its CSS styles. This may look a bit odd for a few moments while it loads.
This is called Flash of Unstyled Content (FOUC). To avoid this, you need to use something called Critical Path CSS, meaning CSS for content at the top of your page should be placed directly in HTML to avoid FOUC while the page loads.
To generate Critical Path CSS, you can use this Critical Path CSS generation tool.
7. Minifying JavaScript files removes white spaces and comments to reduce the size of JS files.
8. Concatenating JavaScript files combines fewer files with information about JavaScript on your site, reducing HTTP requests. Not recommended if your site uses HTTP/2.
Important: This can break things! If you notice any errors on your website after activating this setting, simply deactivate it, and your site will return to normal.
9. Defer JavaScript Loading eliminates render-blocking JS on your site and can improve loading times. This is something Google PageSpeed Insights considers when “evaluating” page speed.
10. Safe Mode for jQuery provides support for embedded jQuery references from themes and plugins by loading jQuery at the top of the document as a script, blocking rendering.
Save and test carefully! Deactivate settings if you notice anything broken on your website.

1. LazyLoad for images means images will load only when they come into view, reducing HTTP requests and improving loading time.
(Sometimes, I disable lazy loading for images only because when lazy loading is enabled, anchor links pointing to positions under lazily loaded images scroll to the wrong position on the web page)
2. LazyLoad for iframes and videos means embedded iframes and videos will load only when they come into view, reducing HTTP requests and improving loading time.
3. Replace YouTube iframes with preview images can significantly improve your loading time if you have many YouTube videos on a page.
(Lazyload can be disabled on individual pages/posts (you find this setting in the post/page sidebar)
4. Disable Emoji should be deactivated as the browser’s default emoji should be used by visitors instead of loading emojis from WordPress.org. Disabling emoji caching reduces HTTP requests, improving loading time.
5. Embeds should be deactivated because it prevents others from embedding content from your site, and it also prevents you from embedding content from other sites and removes JavaScript requests related to WordPress embeds.
Save and test carefully! Deactivate settings if you notice anything broken on your website.
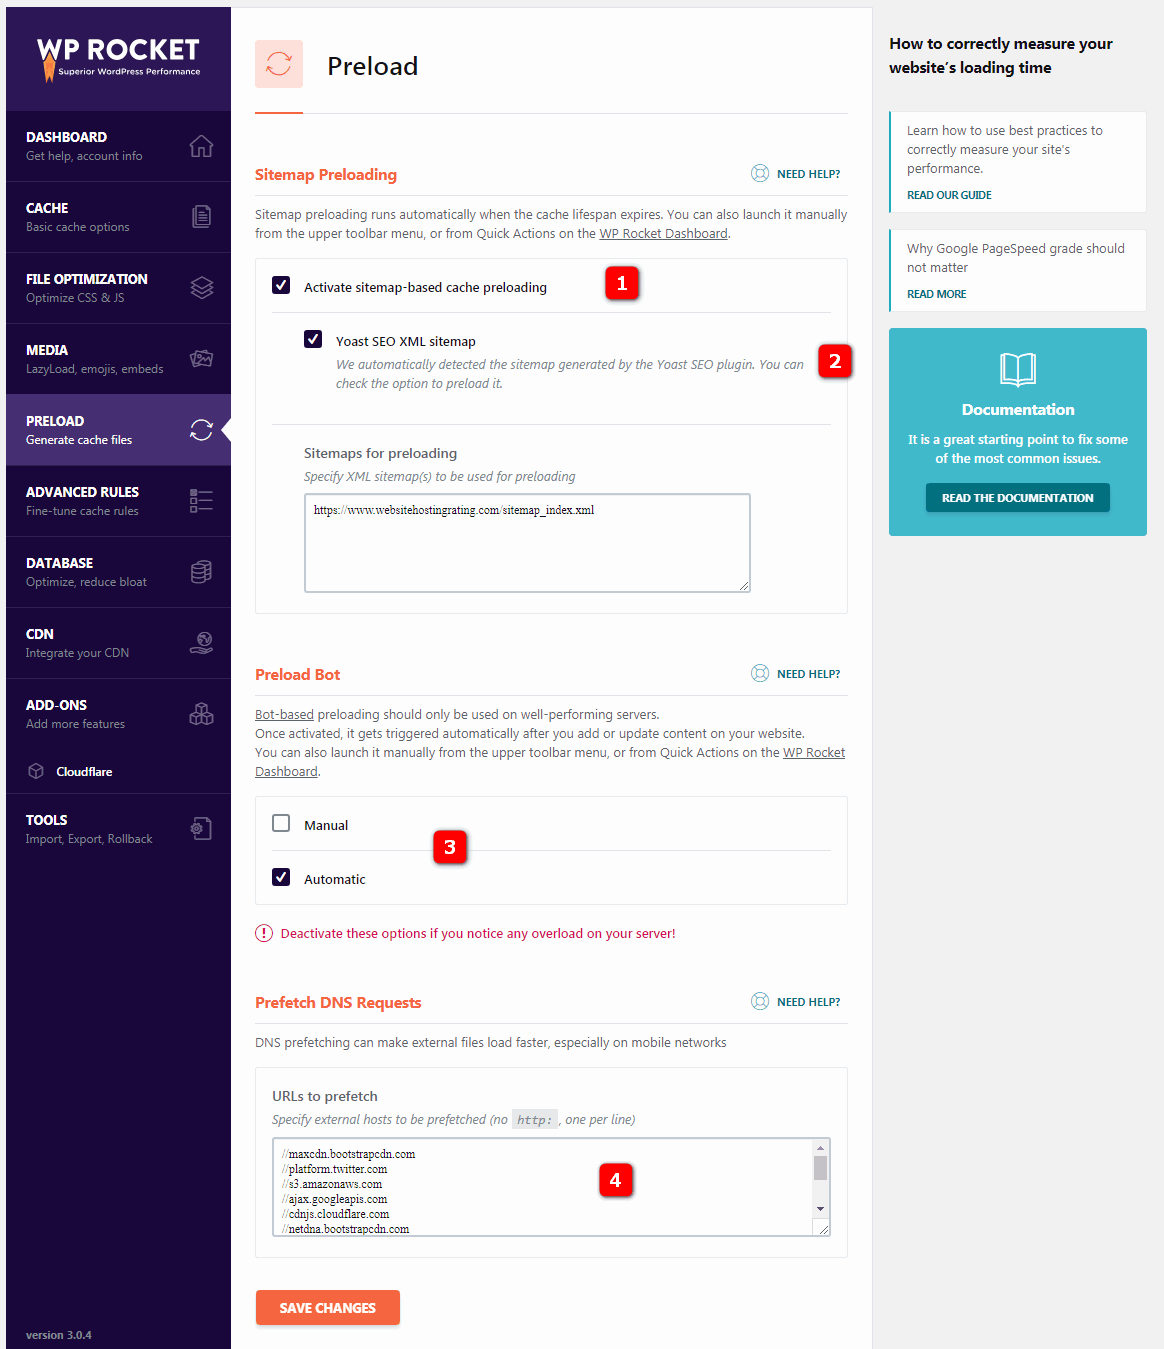
1. Sitemap Preloading: Utilizes all URLs in your XML sitemap for preloading when the cache lifespan expires, and the entire cache is cleared.
2. Yoast SEO XML Sitemap: WP Rocket automatically detects XML sitemaps generated by the Yoast SEO plugin. You can check the preloading option.
3. Preload Bot: Should be activated and used only on well-functioning servers. Once activated, it triggers automatically when you add or update content on your website. Change to “Manual” if it causes high CPU load or performance issues.
When writing or updating a new post or page, WP Rocket automatically clears the cache for that specific content and any other content associated with it. The preload bot will bypass these URLs to regenerate the cache immediately.
5. Preload DNS Requests: Allows parallel resolution of domain names (rather than sequentially with) the extraction of actual page content.
You can set external hosts (like //fonts.googleapis.com & //maxcdn.bootstrapcdn.com) to be preloaded since preloading DNS can make external files load faster, especially on mobile networks.
Most commonly preloaded URLs include:
- //maxcdn.bootstrapcdn.com
- //platform.twitter.com
- //s3.amazonaws.com
- //ajax.googleapis.com
- //cdnjs.cloudflare.com
- //netdna.bootstrapcdn.com
- //fonts.googleapis.com
- //connect.facebook.net
- //www.google-analytics.com
- //www.googletagmanager.com
- //maps.google.com
Save and test carefully! Deactivate settings if you notice anything broken on your website.
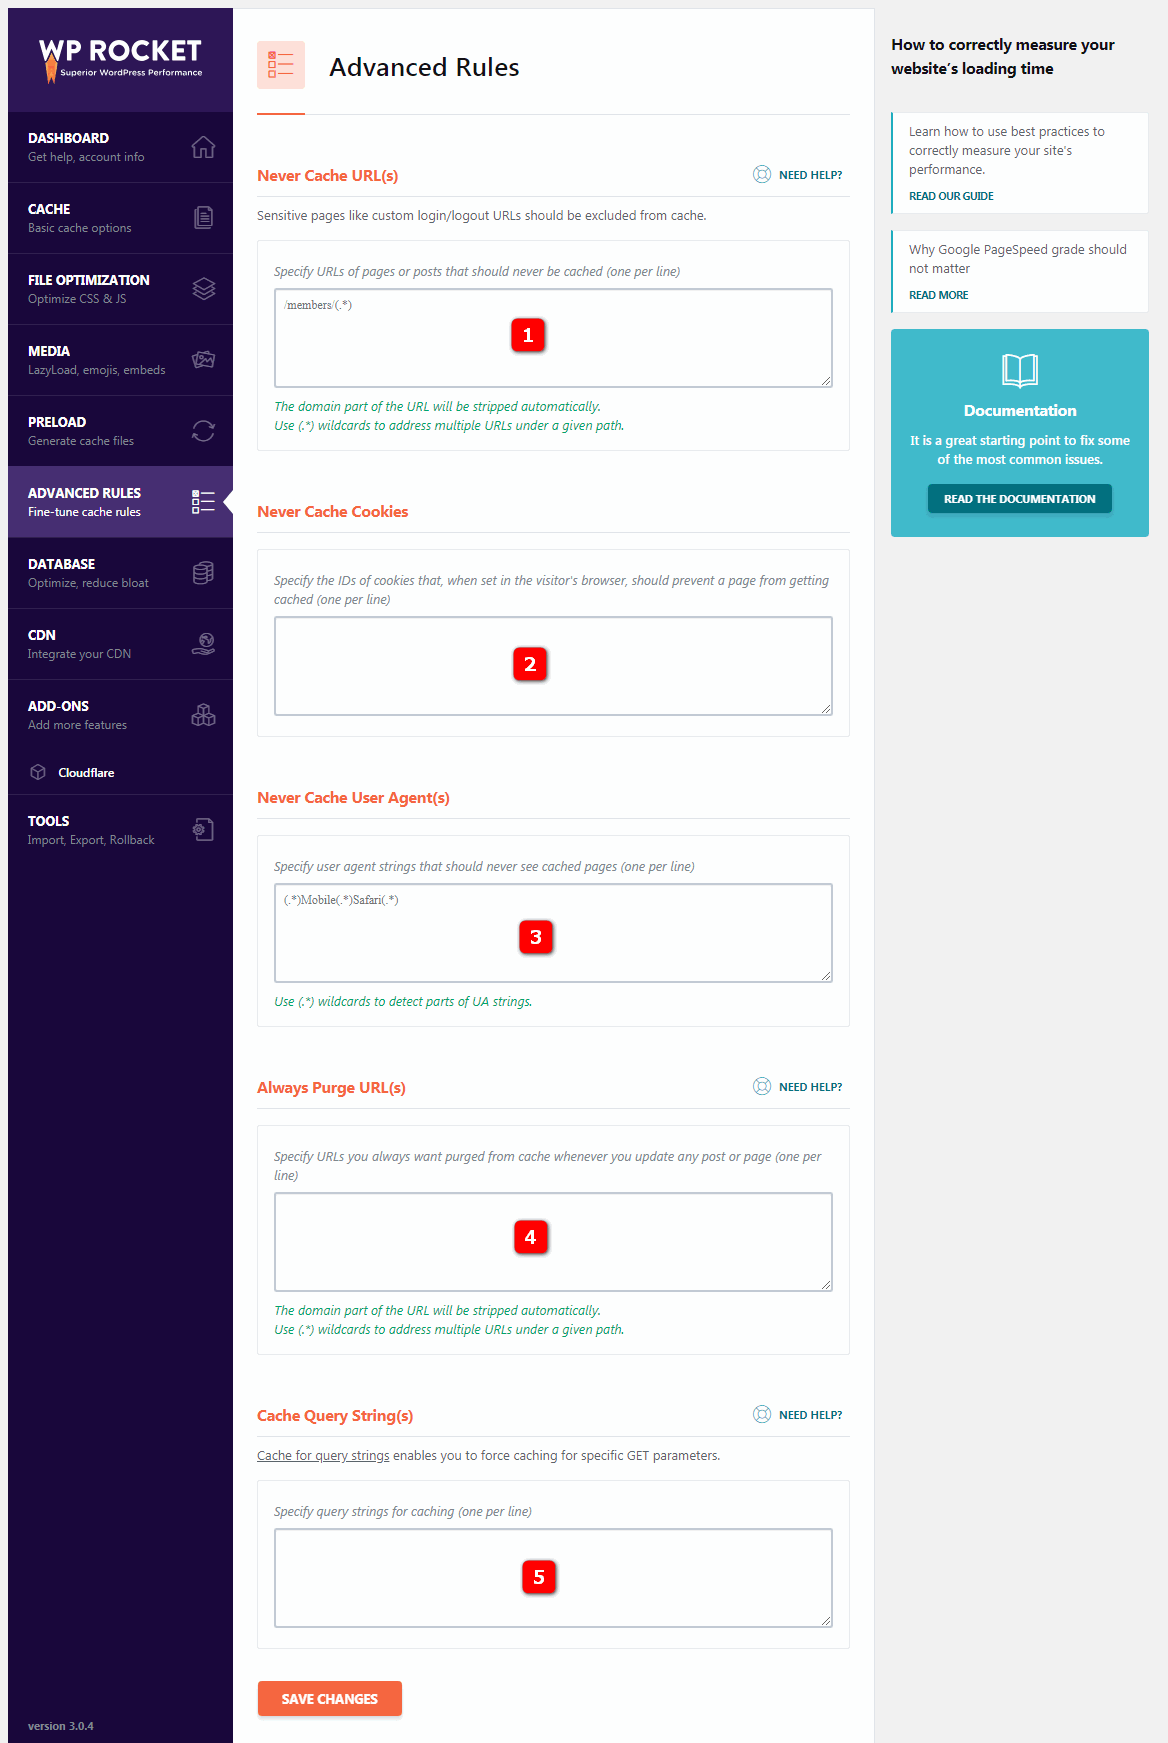
These settings are for advanced cache management, usually for excluding carts and checkout pages in e-commerce sites.
1. Never Cache URL(s): Allows you to specify URLs of pages or posts that should never be cached.
2. Never Cache Cookies: Allows you to specify cookie identifiers that, when set in the visitor’s browser, should prevent page caching.
3. Never Cache User Agent(s): Allows you to specify user agent strings that should never see cached pages.
4. Always Clear URL(s): Allows you to specify URLs that you always want to be cleared from the cache when you update a post or page.
5. Cache Query Strings: Allows you to set query strings for caching.
Save and test carefully! Deactivate settings if you notice anything broken on your website.
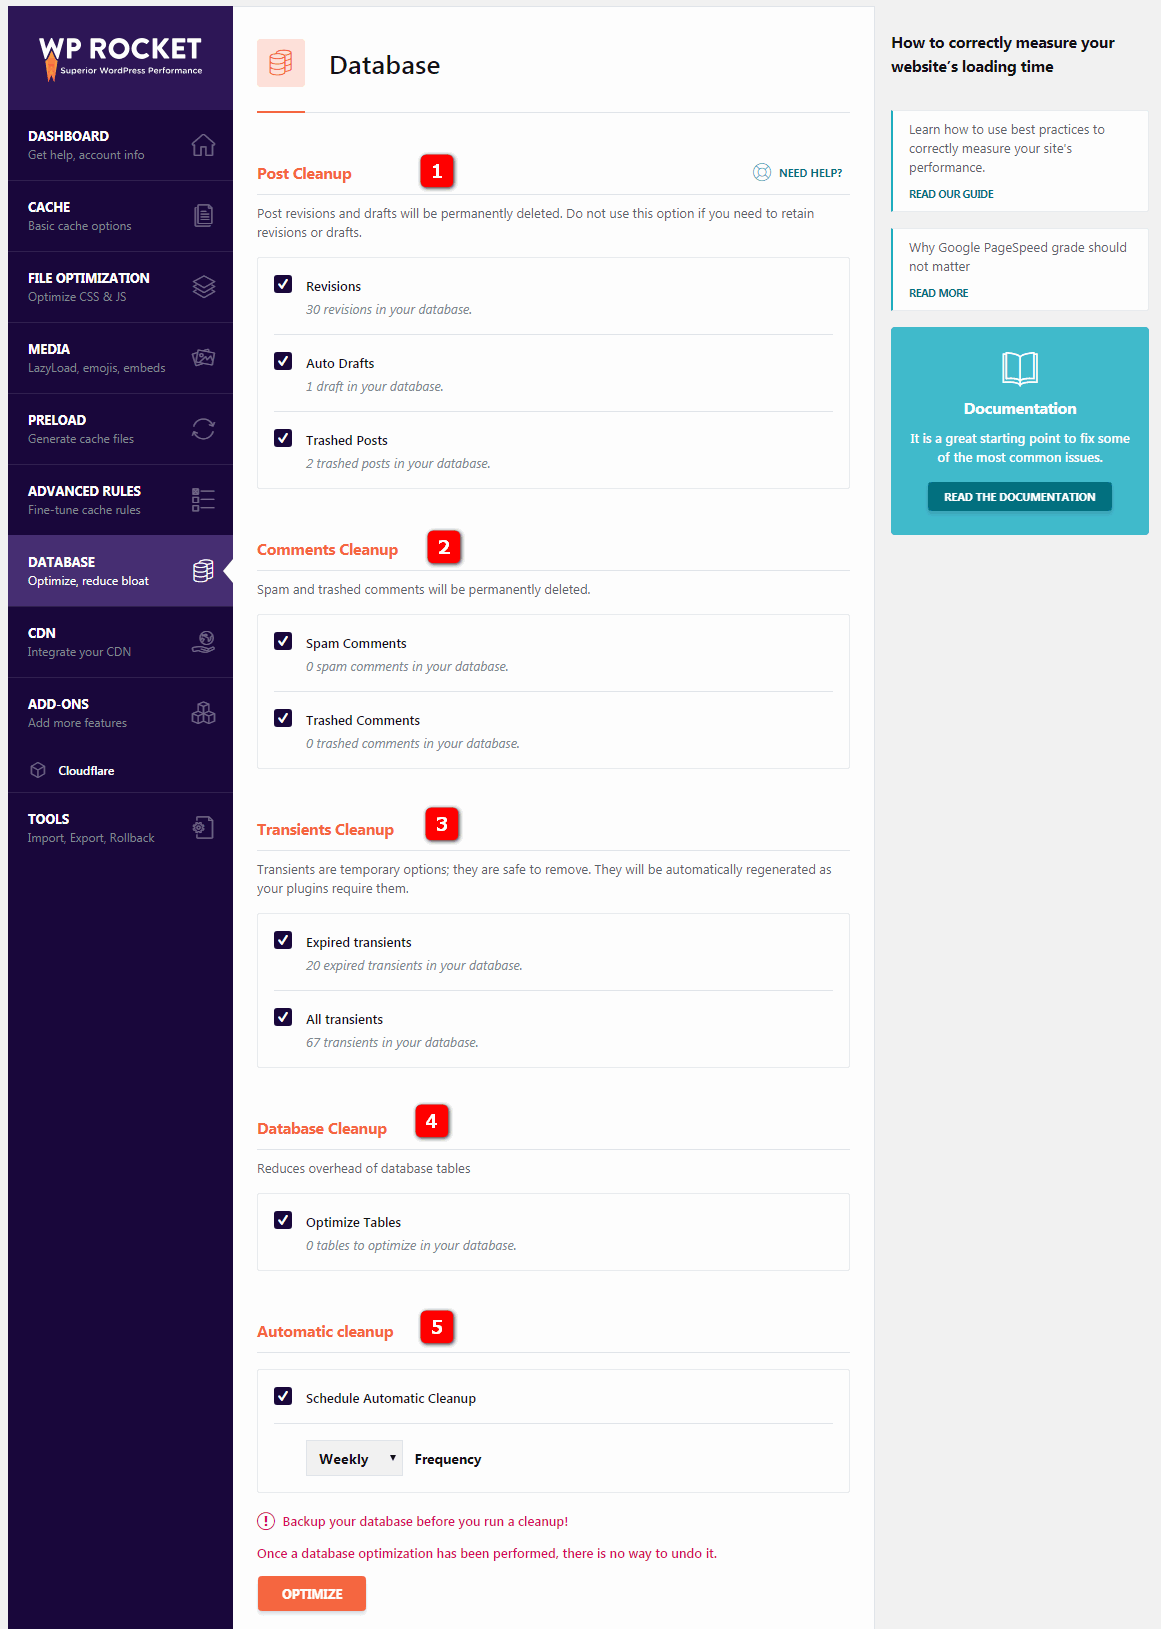
This section provides a set of settings for cleaning and optimising WordPress.
1. Post Cleanup: Deletes revisions, auto-drafts, and trashed posts and pages. Delete them unless you have old versions of posts (or deleted posts).
2. Comments Cleanup: Deletes spam and comments in the trash.
3. Transient Cleanup: Deletes stored data that tracks social media counts. Sometimes, when transients expire, they remain in the database and can be safely deleted.
4. Database Cleanup: Optimises tables in your WordPress database.
5. Automatic Cleanup: Typically, I do a cleanup on an ad hoc basis, but you can also schedule WP Rocket to perform automated cleanups of your database.
Ideally, you should make a backup of your database before initiating cleanup because once the database optimisation is done, there’s no way to undo it.
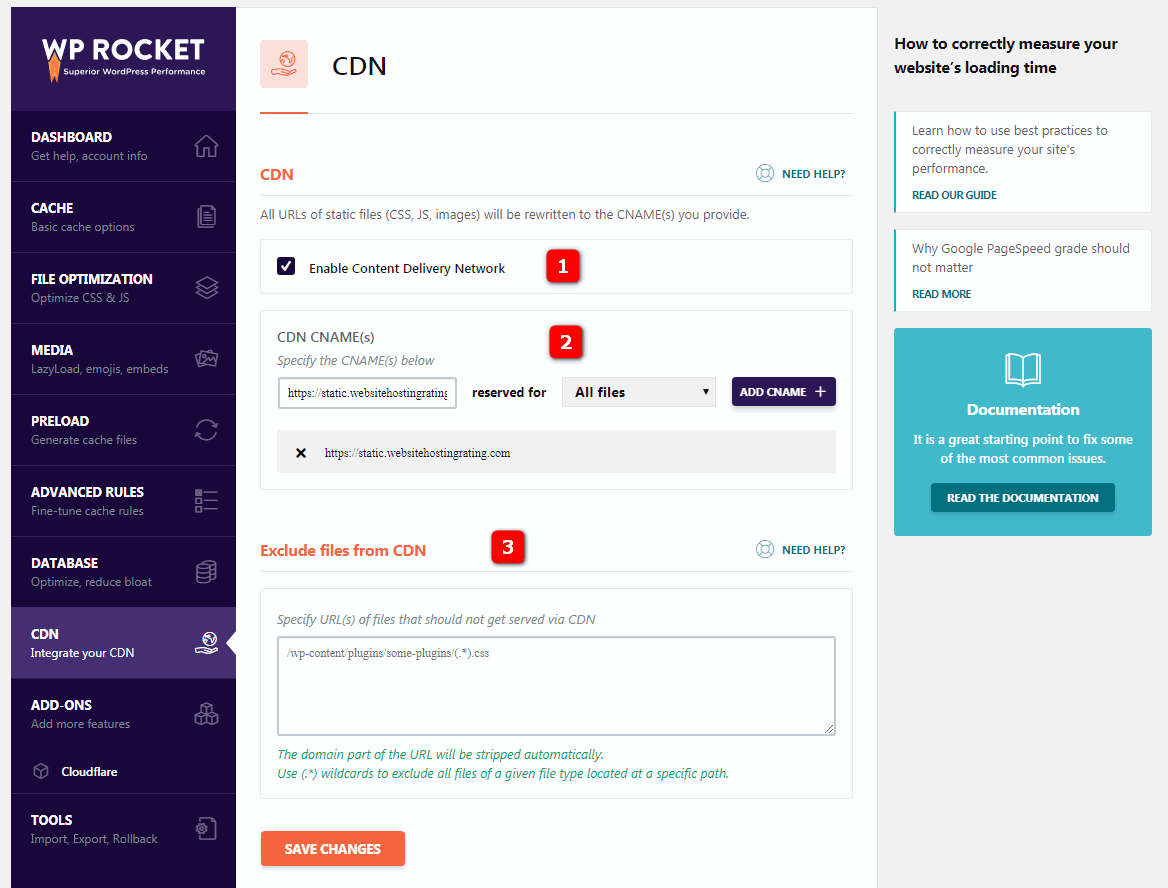
Using a Content Delivery Network (CDN) means that all URLs for static files (CSS, JS, images) will be rewritten to the CNAME you provide.
1. Enable CDN: Activate this if you use a Content Delivery Network. WP Rocket is compatible with most CDNs such as Amazon Cloudfront, MaxCDN, KeyCDN (which I use), and others. Learn more about using WP Rocket with CDN.
2. CDN CNAME(s): Copy the CNAME (domain) provided by your CDN provider and enter it into CDN CNAME. This will rewrite all URLs for your assets (static files).
3. Exclude Files: Allows you to specify URLs of files that should not be served through the CDN.
Save and test carefully! Deactivate settings if you notice anything broken on your website.
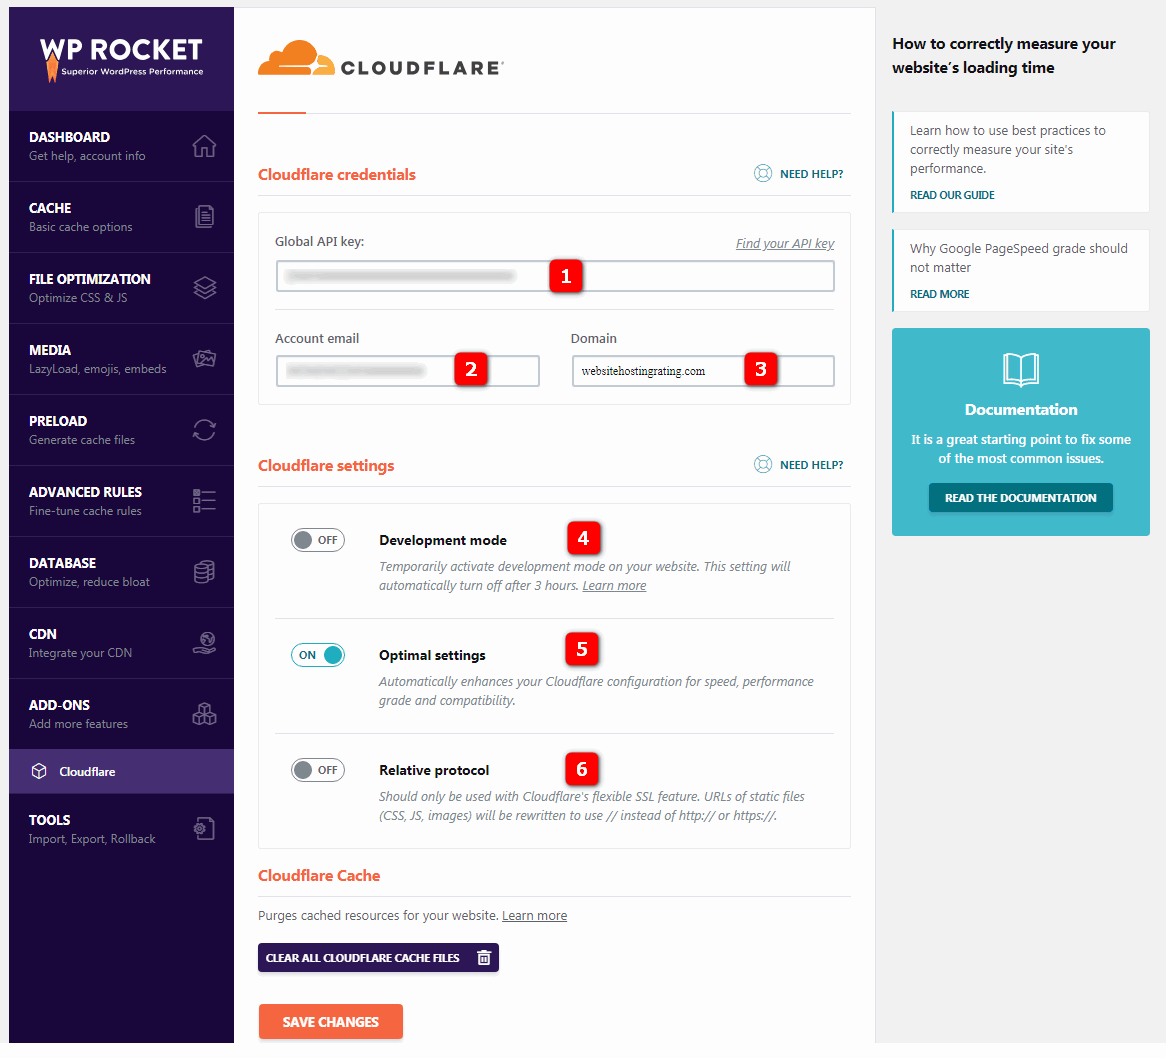
WP Rocket allows you to integrate your Cloudflare account with its add-on feature.
1. Global API Key: You can find the API key in the upper right of your Cloudflare account. Simply go to your profile, scroll down, and you’ll see your global API key. Just copy and paste this into WP Rocket.
2. Account Email: This is the email address you use for your Cloudflare account.
3. Domain: This is the name of your domain, e.g., websitehostingrating.com.
4. Development Mode: Temporarily enable development mode for your website. This setting will automatically turn off after 3 hours. This is useful when making a lot of changes to your site.
5. Optimal Settings: Automatically improves Cloudflare configuration for speed, performance, and compatibility. This option activates Cloudflare’s optimal settings.
6. Relative Protocol: Should only be used with Cloudflare’s flexible SSL feature. Static file URLs (CSS, JS, images) will be rewritten to use // instead of http:// or https://.
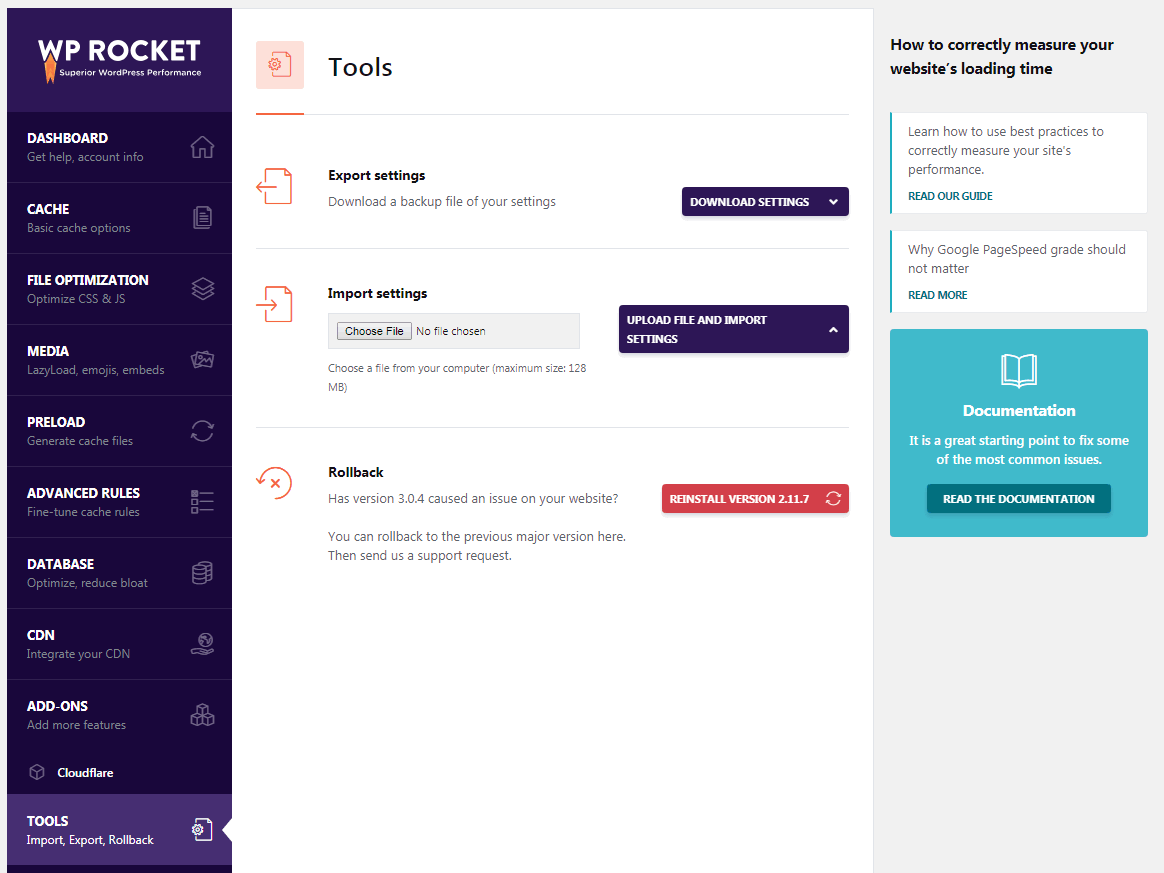
1. Export Settings: Allows you to export WP Rocket settings to use on another site.
2. Import Settings: Enables you to import your pre-configured WP Rocket settings.
3. Rollback: Allows you to revert to a previous version if a new WP Rocket version causes issues.
Configuring WP Rocket for HTTP/2
HTTP/2 is an enhancement of HTTP, which has been around since 1999, managing communication between web servers and browsers. HTTP/2 paves the way for faster page loading through better data compression, request multiplexing, and other speed improvements.
Many servers and browsers support HTTP/2, and most web hosts, such as SiteGround, already support HTTP/2. This HTTP/2 checking tool tells you if your site can use HTTP/2.
If your site can use HTTP/2, here’s how you can configure WP Rocket for it.
Concatenating (combining) all CSS and JS files into as few files as possible is not the best practice for HTTP/2, and WP Rocket recommends not enabling file concatenation in the file optimization section.
WP Rocket recommends leaving these two checkboxes unchecked. For more information, see this WP Rocket article.
Setting up WP Rocket with KeyCDN is quite straightforward. (FYI, KeyCDN is the content delivery network I use and recommend.)
First, create a pull zone in KeyCDN. Then, go to the CDN section and check the “Enable Content Delivery Network” option.

Now, update the “Replace site’s hostname with:” field with the URL you get from the KeyCDN dashboard (under Zones > Zone URL for the pull zone you created). The URL will look something like: lorem-1c6b.kxcdn.com.
Alternatively, and as a recommended option, use a CNAME pointing to your URL (e.g., https://static.websitehostingrating.com).
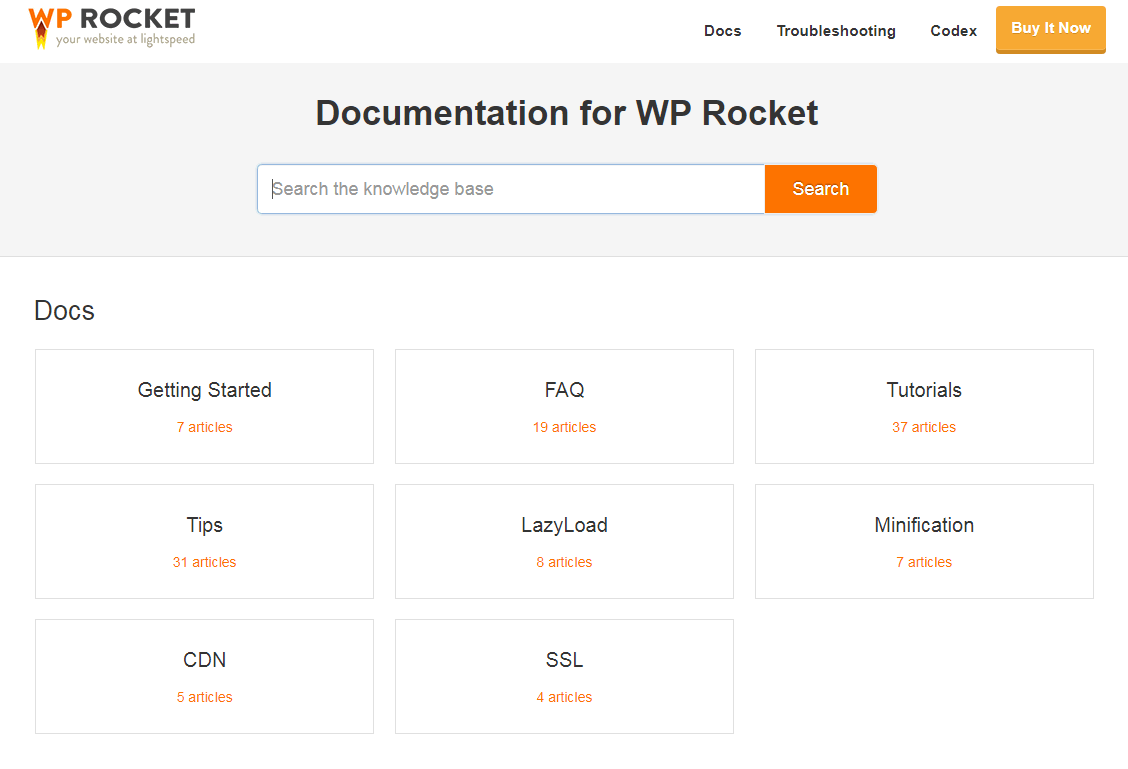
If, for any reason, you encounter issues with WP Rocket, the WP Rocket website provides a lot of helpful information. Don’t forget that you also get 1 year of support with your purchase.