Here, we will demonstrate step-by-step how to install Loco Translate.
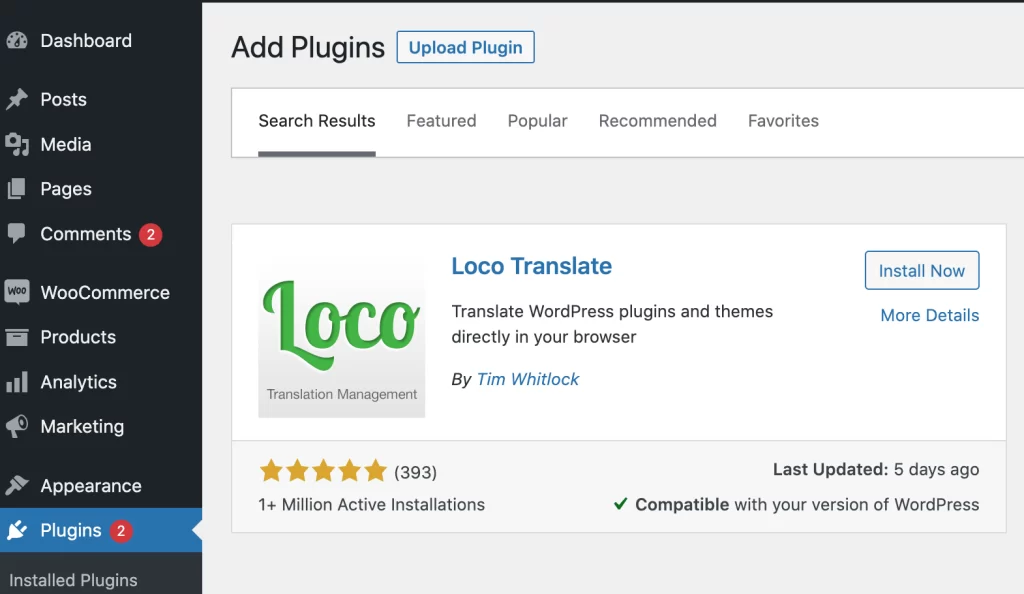
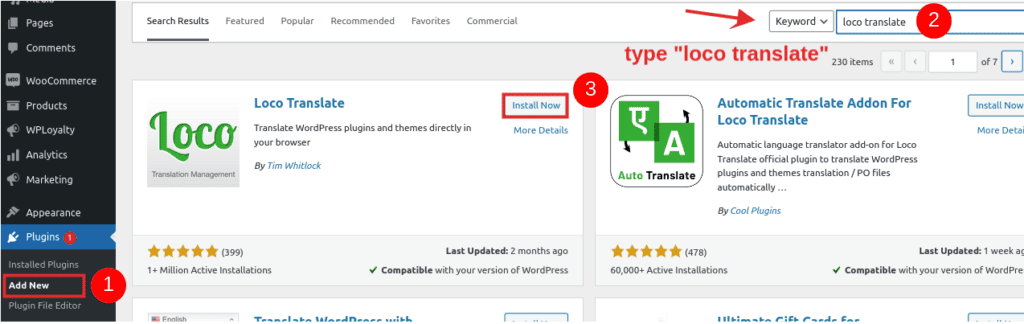
Please go to your WordPress dashboard -> Plugins -> Add New.
Search for “loco translate.”
You will see the LOCO TRANSLATE plugin in the results. Click on “Install Now” and activate the plugin.
Now that the Loco Translate plugin is installed, let’s start using it.
(Required only if you don’t see the language you want to translate the text into in Loco Translate. If you see your language, you can skip this step.)
- Go to Loco Translate -> Plugins -> search for the plugin “Woo Discount Rules PRO 2.0.”
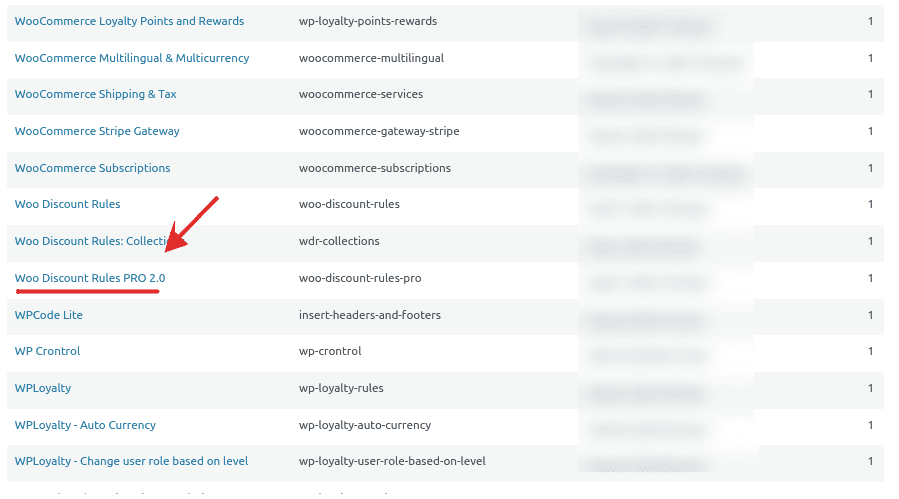
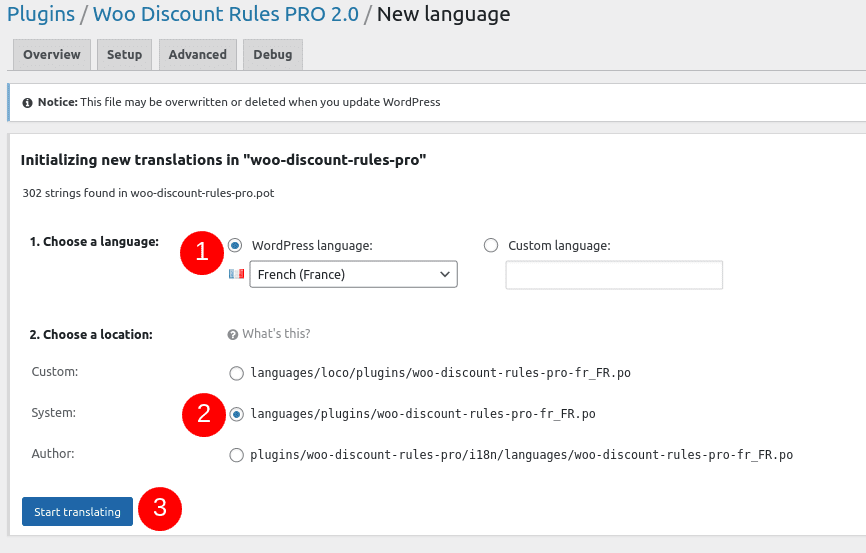
To start translating texts, you need to choose between “Woo Discount Rules” and “Woo Discount Rules PRO 2.0” based on the specific text (referred to as “string”) you want to translate. After selecting the appropriate package, click on “New Language.”
Then, choose the language you want to translate the strings into, and select the location as “System,” as shown in the screenshot below.
Finally, click on “Start translating” to initiate the translation process.
On the next screen, there will be a list of texts/strings available for translation. Choose the text you want to translate.
I How to translate the title:
Go to Loco Translate -> Plugins -> select “Woo Discount Rules” (choose the free package since the discounts table is available in the free version).
Click on the “Edit” option.
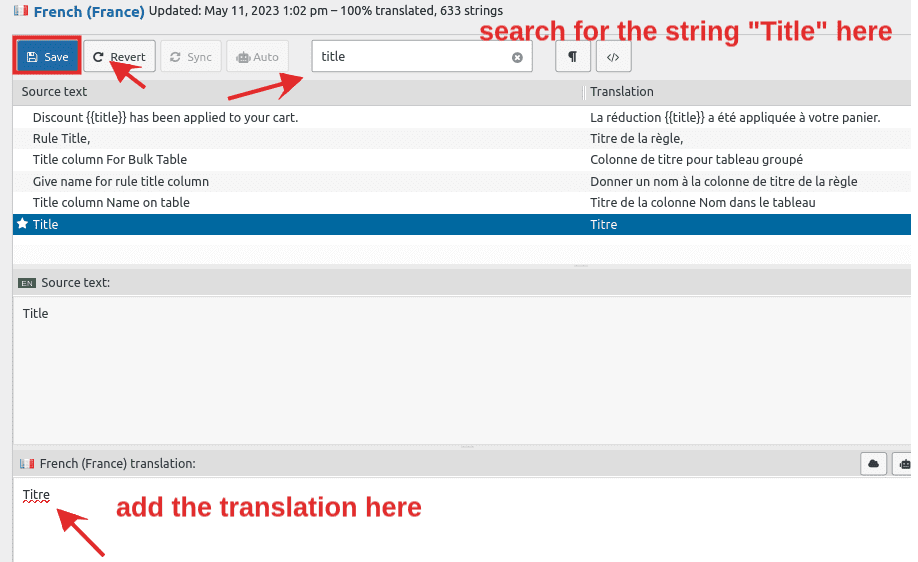
In the search bar, enter the string “Title” to find it.
Translate the original string with the translated version.
Click the “Save” button to save the translated string.
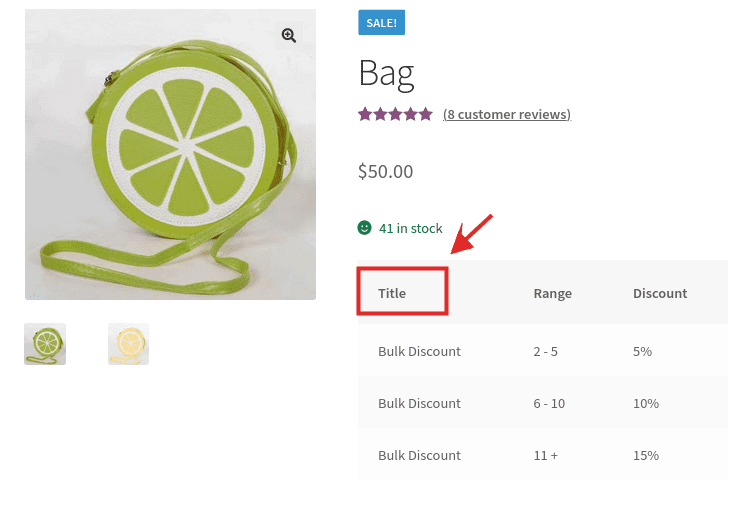
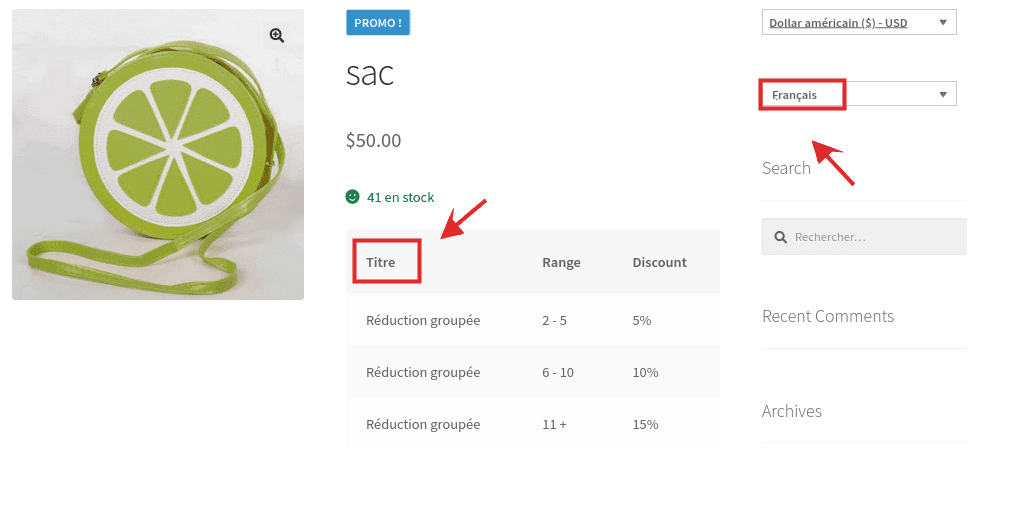
I The screenshot below confirms that the “Title” string has been translated correctly.
I Screenshot showing the “Discount” string
I How to translate the text:
- Go to Loco Translate -> Plugins and select “Woo Discount Rules PRO 2.0” since this is a PRO feature.
- Click on the “Edit” option.
- In the search bar, enter the string “Discount” to find it.
- Enter the translated version of the string.
- Save the translated string by clicking the “Save” button.
I Detailed screenshot illustrating the translation process is provided below.

I The screenshot below confirms that the string “Discount” has been translated correctly:
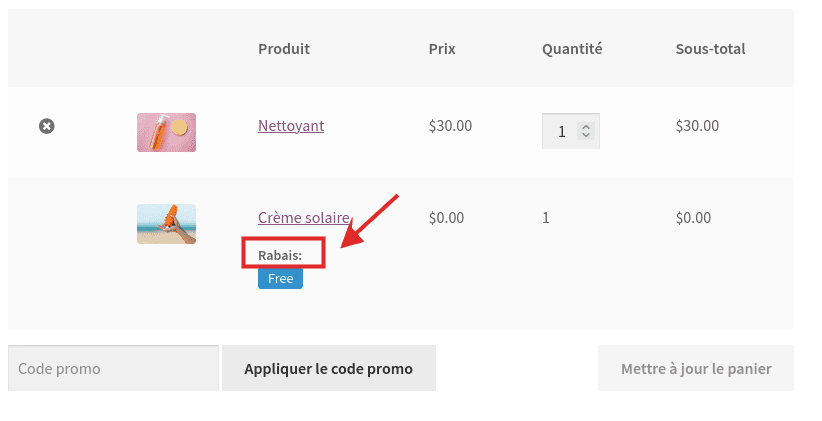
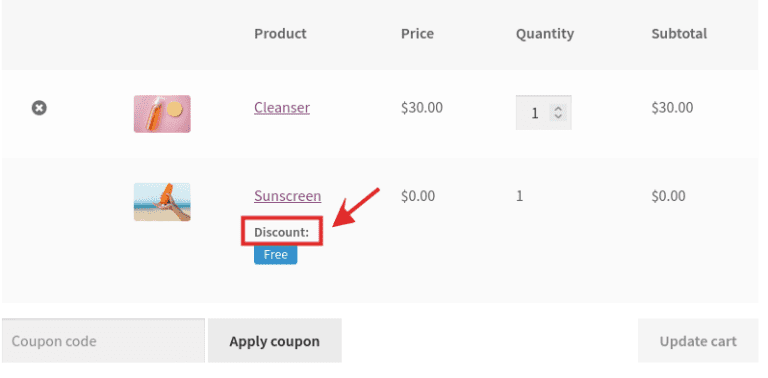
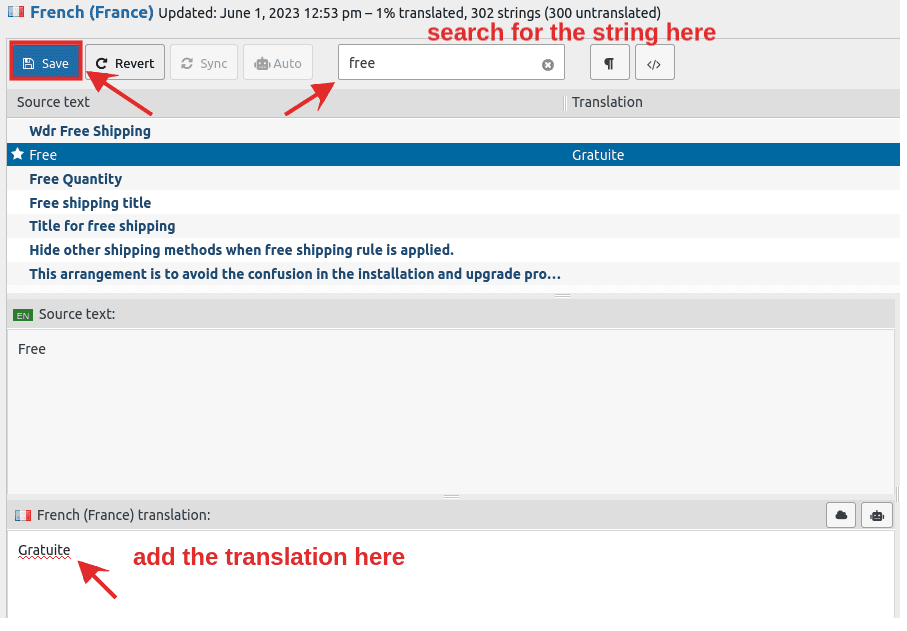
I Screenshot showing the text “Free”:

I How to translate the string:
- Go to Loco Translate -> Plugins and select “Woo Discount Rules PRO 2.0” since this is a PRO feature.
- Click on the “Edit” option.
- In the search bar, enter the string “Free” to find it.
- Enter the translated version of the string.
- Save the translated string by clicking the “Save” button.
I Detailed screenshot illustrating the translation process:
Dynamic strings like “Discount Bar,” “Rule Title,” and “Discount Label” are not included in the LocoTranslate translation table by default as they are added dynamically by users. To translate these dynamic strings, you need to follow a specific process.
Firstly, you need to add these dynamic strings to the .pot file using the “Edit Template” option. Then, you can search for these strings in the plugin’s .po file and proceed with the translation.
Let’s take the example of translating the dynamic string “Discount Bar” to understand the process.
I Screenshot showing the “Discount Bar” string:

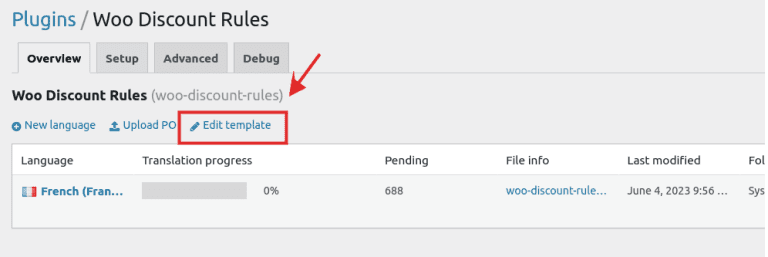
I Step 1: Adding strings to the Woo Discount Rules .pot file:
Go to Loco Translate -> Plugins -> select Woo Discount Rules.
I Click on the “Edit Template” option.
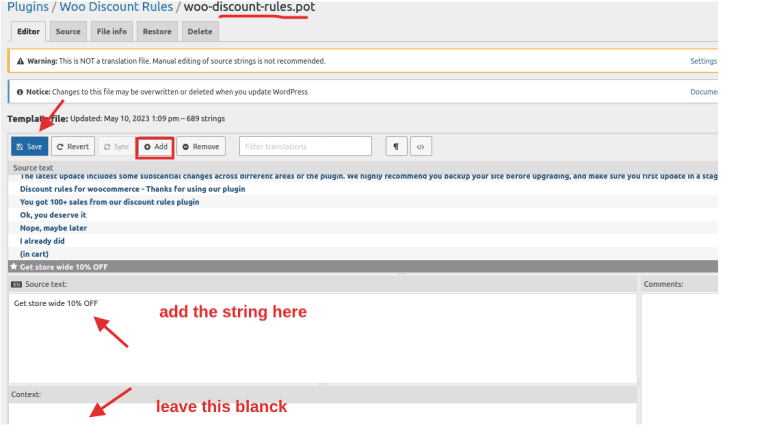
Click on the “Add” button and add the “Get 10% OFF for the entire store” string to the plugin’s .pot file. Save it as shown in the screenshot below.
I Step 2: Translating the Discount Bar string:
- Go to Loco Translate -> Plugins -> select “Woo Discount Rules.”
- Click on the “Edit” option and “Sync” the strings to the .po file of Woo Discount Rules.
- Search for the string “Get 10% OFF for the entire store” in the search bar, enter the translated string.
- Click the “Save” button to save the translated string, as shown in the screenshot below.
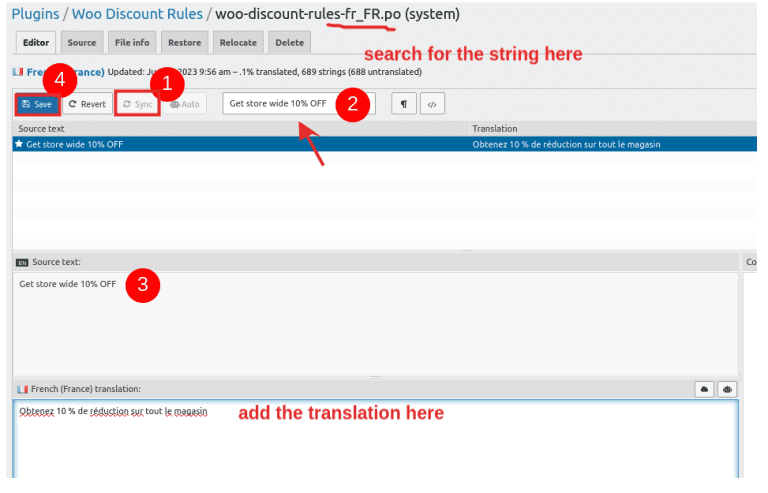
I The screenshot below confirms that the Discount Bar string has been translated correctly:
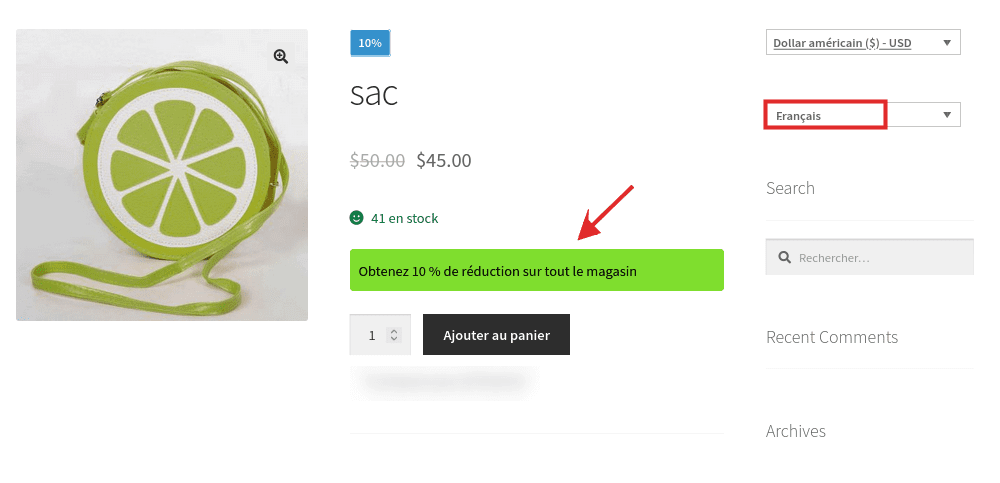
Similarly, you can apply the same method to translate all dynamic strings from the WooCommerce Discount Rules plugin.
If you encounter difficulties, our team of professionals will gladly assist you in these steps.
