PrestaShop - 3 methods for step-by-step installation

3 main methods for installing PrestaShop
PrestaShop logo

This is a general installation guide for PrestaShop. However, it is important to note that the process may vary depending on your hosting environment and the tools you are using. Always follow the instructions provided by PrestaShop and your hosting provider, and regularly back up your data for security.

General information

This is a general installation guide for PrestaShop. However, it is important to note that the process may vary depending on your hosting environment and the tools you are using. Always follow the instructions provided by PrestaShop and your hosting provider, and regularly back up your data for security.

What is PrestaShop?

PrestaShop is one of the leading open-source e-commerce platforms, created in 2007. It provides tools and functionalities that allow users to create and manage online stores. PrestaShop is based on PHP and uses a MySQL database.

PrestaShop CMS

Features and functions

PrestaShop is available for free download and installation. This makes the platform a popular choice among small and medium-sized enterprises looking for an e-commerce solution with reliable features and customisation flexibility.

  • Product management: Allows users to add, edit, and manage the product catalogue, including descriptions, prices, availability, images, and other attributes.
  • Order management: Provides tools for order processing, shipment tracking, invoice generation, and returns management.
  • Customer management: Enables storing customer data, profile management, discounts, loyalty programs, and communication with customers.
  • Payment management: Supports various payment methods, including credit cards, PayPal, bank transfer, and others.
  • Shipping management: Provides options for configuring carriers, shipping costs, shipment tracking, and generating shipping labels.
  • Multilingual and multi-currency support: Allows users to create stores in different languages and currencies, suitable for the global market.
  • Themes and modules: Offers a rich set of themes and modules that users can use to personalise and extend the functionality of their stores.
  • SEO: Includes built-in tools and settings to improve the store’s Search Engine Optimisation (SEO), enhancing its visibility in search engines.

Installation methods

If you’re looking for how to install PrestaShop, you’ve come to the right place. With millions of downloads and thousands of stores, installation tutorials are always in demand. Fortunately, there are many online resources to help you install PrestaShop. You can install it using one-click installers provided by your hosting provider, or you can install it manually using MySQL and FTP. Finally, you can install a local version of PrestaShop on your personal device for testing or development purposes. In this article, we will provide a comprehensive guide on how to install PrestaShop. 

1. Manual installation via MySQL and FTP: If you are comfortable working with MySQL and FTP, you can install PrestaShop manually. This process will require some basic technical skills, such as creating a database and uploading files to your server via FTP. We will provide detailed steps for both processes in the guide below.

This manual installation method will be covered in “Method 1” of this article.

2. One-click installation with hosting provider: If you have a hosting account that provides PrestaShop installation scripts, this is the easiest way to install PrestaShop. Simply check your host’s documentation or contact their support team for instructions on how to install using the one-click script. Softaculous is the most well-known automatic installer, and that’s the one we’ll be discussing in this guide.

If you can’t find one-click installers on your hosting panel, contact your hosting support for assistance. Specialized hosts may not always have these packages on your server, while shared hosting usually provides one-click installers.

This one-click installation method will be covered in “Method 2” of this article.

3. Local installation: Local installation is installed on your personal device, not on a hosted server. Localhost installations are great for testing or development purposes as they don’t require payment for hosting services. You can create a local installation using MAMP, WAMP, Laragon, EasyPHP, or XAMPP. We won’t go into details about localhost installation as it is already covered in a technical guide by PrestaShop devdocs. We recommend using Laragon in any case.

If you’re unsure how to do this, contact your hosting support for assistance.

Method 1: Manual installation of PrestaShop via MySQL and FTP

Regardless of the PrestaShop version you want to install, the installation process works the same way. In this guide, we will walk you through the installation of the latest version of PrestaShop.

Before installation, ensure that your server meets the correct configuration requirements. In most cases, it should work perfectly. If in doubt, send the requirements to your hosting provider and ask if they support them.

Downloading PrestaShop

To begin the PrestaShop installation process, download the latest version from the PrestaShop website. This will provide you with a .zip file containing all the necessary files.

Click “Download” to get the latest version of PrestaShop. If for some reason you want to install a lower version, you can click on the “All versions” link to see other PrestaShop versions

www.prestashop.com

Uploading files to your server

Next, extract this file onto your desktop or another local folder where you store files while working on them (keep track of its location). Once you open the folder you downloaded from prestashop.com, the contents will look like this:

PrestaShop

Here you have two options:

  1. Extract the files before uploading them to your server.
  2. Keep the file compressed and upload it to your server. This will work well if you have access to a control panel where you can unzip the file from the file manager.

Uploading the zip file to the server and unzipping from the file manager

The first option is simply to drag the prestashop.zip file onto your server. You’ll need FTP for your server, and you can use FileZilla as an FTP program. Your main folder is likely called “public_html,” and you should upload the prestashop.zip file there.

  • After you’ve uploaded the zip file to your server, if you have a control panel like DirectAdmin or cPanel, go to the control panel and enter the file manager.
  • For DirectAdmin: Click on “File Manager”

File manager

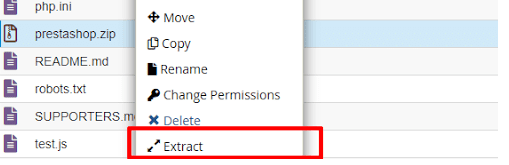
  • Click twice on the “public_html” folder, right-click on “prestashop.zip,” and click “Extract.”

Unzipping

Other control panels may appear differently or require a different method, but generally, they all operate in the same way. 

Extracting the folder on your local computer and uploading to your server

The second option is to first extract the folder on your computer and then upload the folder to the server. After extracting all the files, you can simply drag the “prestashop” folder into “public_html” using FileZilla.

This process can take from 5 minutes to an hour (or even more), depending on internet speed.

filezilla

If you have a control panel, we recommend executing step 1.b, as the file extraction method from the control panel is much faster.

Creating the database

Some hosting providers create a database for you, while others do not. If you already have a database created, skip this step and proceed to step 4. If not, continue reading! Now we need to create a database on your control panel by following these steps:

  • cPanel: Log in to your control panel.
  • In the Database section, click on “MySQL® Database Wizard” or “MySQL Wizard.”

MySQL

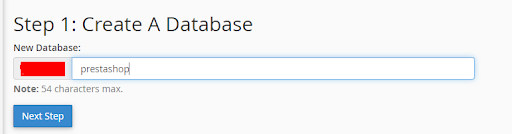
  • On the next page, enter a database name (we’re using “prestashop,” but you can name it as you wish) and then create a username for your database. Make sure to remember this password as you will need it later. Click on “Create Database.”

create a database
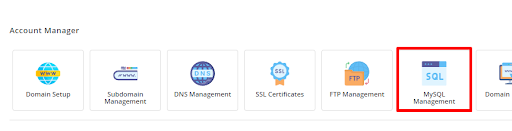
  • DirectAdmin: In DirectAdmin, click on “MySQL Management.”

database management

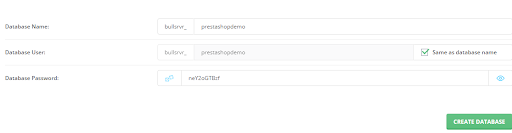
  • Click on “Create a new database” in the upper-right corner and enter the database name.

  • Generate a password and click on “Create Database.”

    new database
  • Now that we have our database created, let’s proceed with the PrestaShop installation.


Installing via the installation assistant

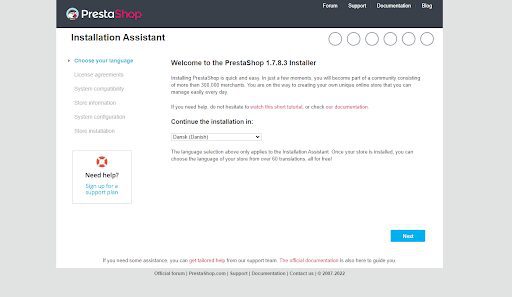
If you have installed your files in the main directory, as shown earlier in step 2 (both steps 2.a and 2.b), you can access your installation by going to “yourdomain.com.” This will automatically open the PrestaShop installation assistant.

PrestaShop installation assistant

System compatibility

If your system is compatible with PrestaShop, this step will be skipped automatically, and you will be redirected to step 4 (Saving Information). If there are issues, you will be prompted for the exact problem. If in doubt, ask your hosting provider.

Adding website information

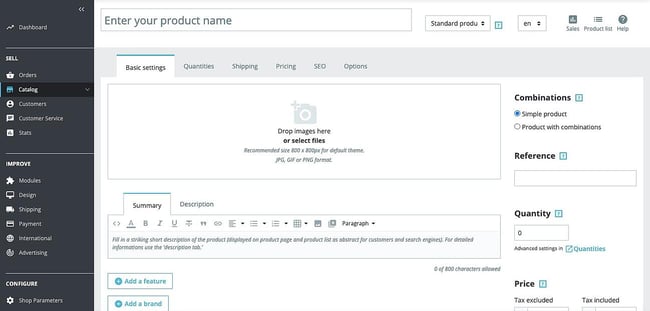
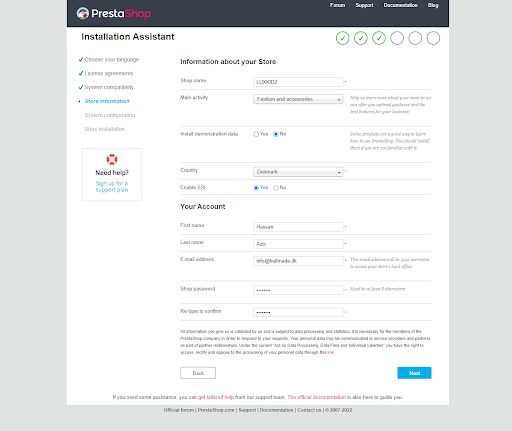
In this step, you need to provide information about your store. This is the information that will configure your PrestaShop store, so make sure to fill it in correctly. Everything can be changed later. You also need to choose whether you want PrestaShop to install demo orders and demo products for you.

Website information

  • Store name: Enter the name of your store. This name will appear on invoices, the website, etc.

  • Main activity: Choose the main activity of your store. This is for statistical purposes and is not mandatory. Skip it if you wish.

  • Install demo data: Choose “Yes” or “No” to decide if you want demo products and data on your site. If you’re using PrestaShop for the first time, we recommend selecting “Yes.” This way, you can see how orders, products, categories, etc., look.

  • Country: Select the main country for your store.

  • Activate SSL: If you have SSL enabled on your domain, set this to “Yes.” If not, set it to “No.”

The information under “Your Account” is used to create the main back office account for your store. You can always edit the information and add more accounts/users later.

Configuring the database

You’re almost ready!

Now, onto the technical part. Remember in step 3 when you created the database? This is the information you need to use now.

Prestashop configuring database

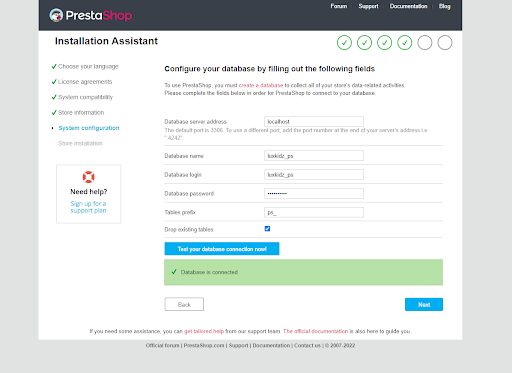
  • The database server address should be “localhost” unless provided with a different address.
  • The database name and user are the ones you created earlier, along with the password.
  • Keep the table prefix as “ps_” unless you already have a PrestaShop installation in the same database with the same prefix. In that case, you should also uncheck the option “Delete existing tables.” If it’s a new installation, leave the options as they are and click the “Test your database connection now!” button. If successful, you’re just a button press away from installing PrestaShop.
  • Press the “Next” button, and let’s continue…

Installing the store

The installation process usually takes no more than 3-5 minutes. You can follow the progress bar to see the installation status.

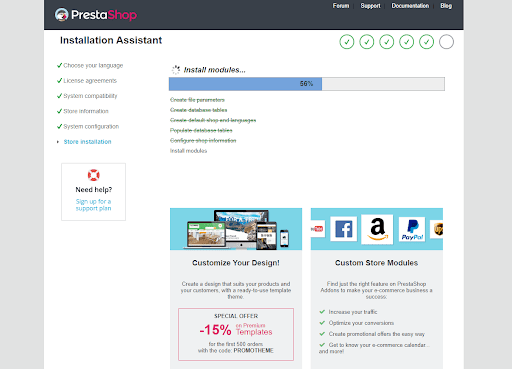
  • Once the installation is complete, you’ll see a screen with information about your back office and a link to it

Prestashop installation progress

  • Your PrestaShop store is now ready to use!

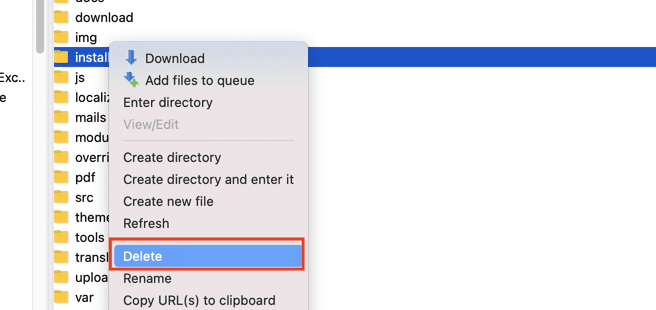
  • You can click on “Discover your store” to see how the interface looks and “Manage your store” to access your backend. When you click on “Manage your store,” you’ll be prompted to remove the /install folder. You can delete this folder through the file manager (in cPanel or DirectAdmin) or via FTP with an FTP client like FileZilla.

  • Using FileZilla, right-click on the /install folder and select “Delete.”

delete

Deleting the installation folder usually takes 1-2 minutes.

  • Once deleted, return to the back office and refresh the page. Now you’ll see the login page, where you can log in to your freshly installed PrestaShop.

Method 2: Installation through cPanel on a hosting provider

The first guide covered the “manual” way of installing PrestaShop. In this guide, you will learn how to install PrestaShop with just a few clicks, as mentioned earlier, requiring your server to have a one-click installer, preferably Softaculous.

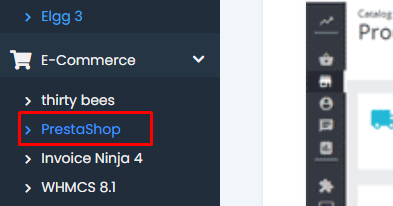
You can ask your hosting provider or simply access the control panel of your hosting and look for a one-click installer. If you see “Softaculous Auto Installer,” click on it.

softaculous

  • Select “E-commerce” from the menu and click on PrestaShop.

softaculous

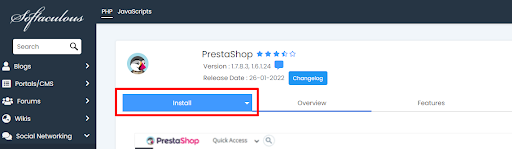
  • Click on the blue “Install” button above, leading you to the quick installation.

Installation

  • On the next screen, you can choose the following options:

Quick Installation of PrestaShop

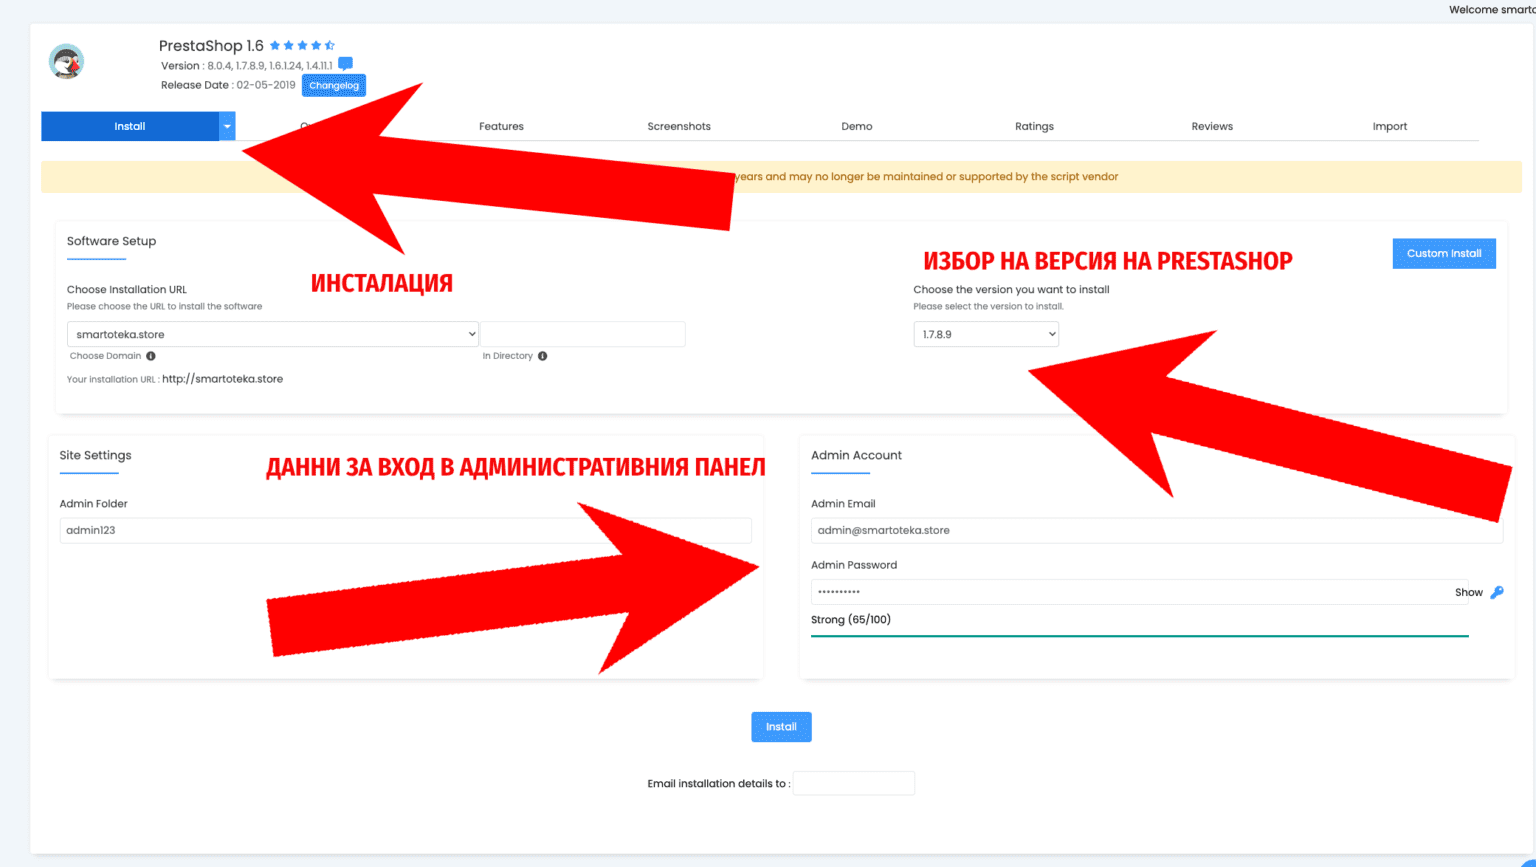
  • Select the domain where you want to install PrestaShop.
  • Choose the version you want to install.
  • Enter the name of the store and the admin folder (name it something other than “admin” or “admin123,” making it less accessible, like “psadminoffice,” etc.).
  • Enter your account details.
  • Then press the “Install” button.

PrestaShop installation status

Ready PrestaShop Installation

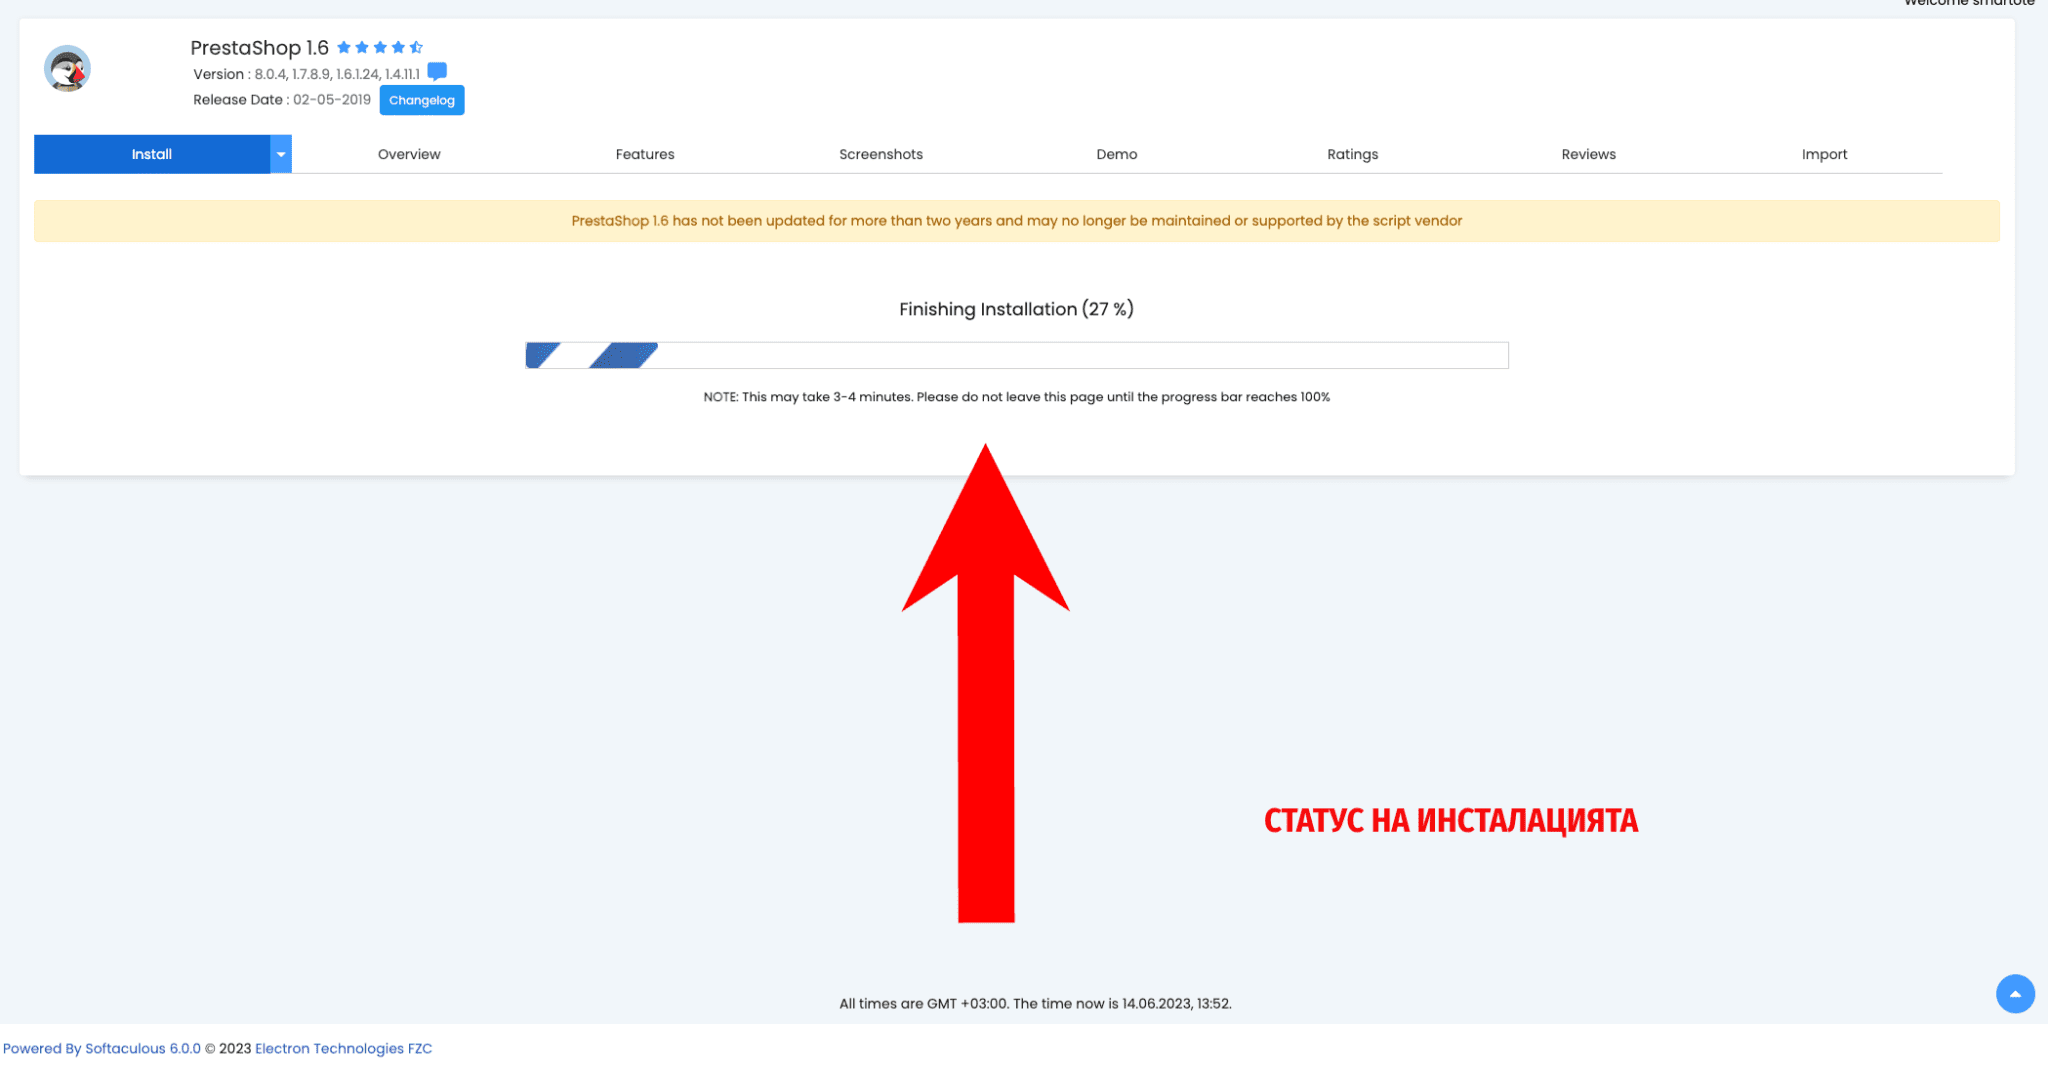
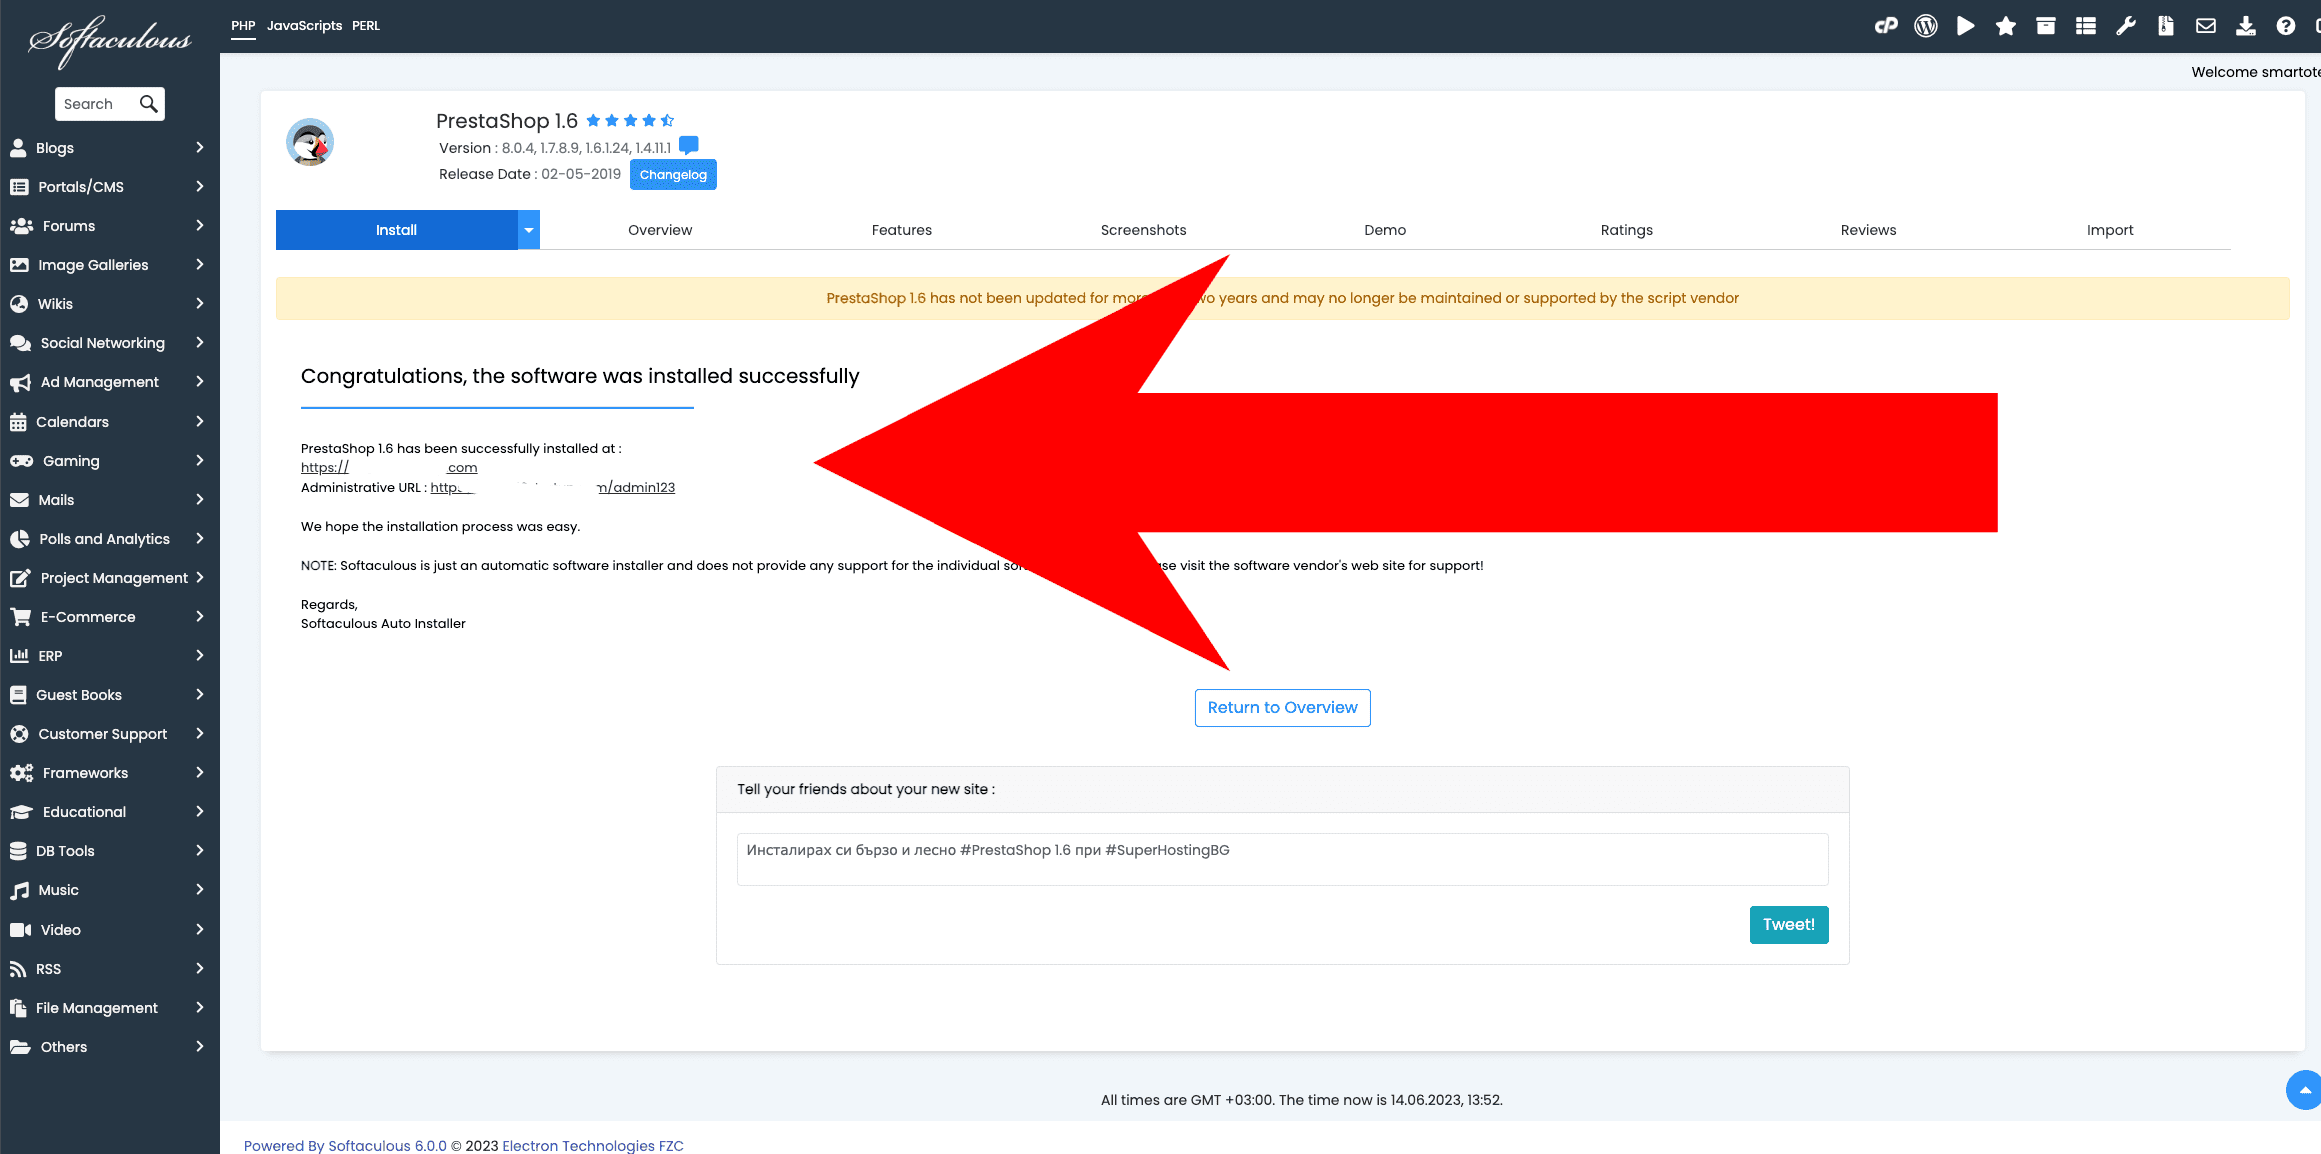
That’s it – you’re done!

Everything is installed for you, and you are ready to use PrestaShop. This method is obviously much faster and easier than Guide 1, so use this guide if you have a one-click installer on your server. 99% of all shared hosting services have it, and if you use a different hosting plan, ask your hosting provider.

Now you know how to install PrestaShop almost anywhere. If you have questions, the place to go is our special forum for PrestaShop installation. Our managers and community moderators are active and ready to help. Most of the issues you’ll encounter during installation are server-side problems, usually related to permissions.

That’s why it’s best to use a hosting provider with PrestaShop. Installing PrestaShop is just the first step to turning your idea into a successful online venture.

Frequently asked questions about installation

  • Do I need technical expertise to install PrestaShop?
    It might be challenging if you lack technical knowledge; we recommend using a one-click installer. Most hosting companies have one-click installers, and you can inquire with your hosting provider.

  • How do I install PrestaShop on my computer?
    PrestaShop has a dedicated guide on how to install it locally.

  • Is PrestaShop free?
    Yes, PrestaShop is open source and 100% free to install. However, you’ll need to pay for hosting. Nonetheless, you can set up a store with minimal costs by using PrestaShop.

  • Can I get assistance with the installation?
    Yes, if you’re unsure how to install, you can either ask your hosting company for help with the installation or seek assistance from us through the steps.

  • Is PrestaShop ready to use after installation?
    You’ll need to configure your products, categories, payment methods, shipping methods, etc. Most settings are straightforward, and after installing PrestaShop and logging in for the first time, there’s a guided tour that will assist you with these steps.

  • Can PrestaShop be used for B2B?
    Absolutely. Some store owners decide to run both their B2C and B2B operations on PrestaShop, while others separate them by installing one instance for B2C and another for B2B.

Victoria Pencheva
About the author
Call Now Button