Google Site Kit - Easy steps guide

Learn how to install Google Site Kit and why it’s important
Google Site KIt for WordPress

Google Site Kit - Easy steps guide

What is it and what is it for?

Google Site Kit is a free tool provided by Google that helps webmasters and website owners analyse and optimise their sites using data from various Google products, such as Google Analytics, Search Console, AdSense, and others. 

Site Kit consolidates information from these tools and presents it in one place, in your website’s admin panel. This makes it easier to access analytical data and key indicators for your website without the need to switch between different platforms and applications.

With Google Site Kit, you can track website visits, keywords through which users find your site, and other useful statistical data. Additionally, you can understand how your site appears in Google search results and receive suggestions for SEO (Search Engine Optimisation) improvements and advertising campaigns.

Installing Google Site Kit on your site has many benefits. It allows you to effectively monitor and analyse your website’s performance, receive optimisation suggestions, and manage your advertising campaigns more easily and efficiently. Ultimately, Google Site Kit helps you enhance the visibility and success of your websites by leveraging Google’s tools. 

Table of contents

If you manage a website, you probably rely on Google services for analytics tracking, performance testing, and more. Managing all of them can be challenging, which is why there is already a plugin called Site Kit for WordPress.

With the official Google Site Kit plugin, you can connect all your favourite Google webmaster services to WordPress. Where applicable, you’ll also be able to review data in your WordPress dashboard, including your Google Analytics statistics.

In this review, we’ll take a closer look at the Google Site Kit plugin for WordPress, what it has to offer, and how to set it up.

Let’s get started!

Introduction to Google Site Kit

Site Kit is a plugin that allows you to connect your WordPress website with these six Google services:

  1. Search Console: With Search Console, you can monitor your site’s traffic, performance, and indexing status.
  2. Analytics: Google’s popular web analytics tool provides a vast amount of data about your website visitors, which is invaluable for marketing and optimisation.
  3. AdSense: If you want to monetise your website through ads, AdSense is one of the most popular platforms you can use to insert ads.
  4. PageSpeed Insights: This tool allows you to test your website’s performance, providing an overall score and a wide range of suggestions to improve the desktop and mobile experience.
  5. Tag Manager: This service allows you to add tracking pixels and fragments to your website without manually changing the code.
  6. Optimise: With Optimise, you can conduct in-depth A/B tests for your website. It integrates with Google Analytics to give you a better understanding of the results. 


It’s important to understand that Site Kit is not a replacement for any of the services listed above. Instead, it simplifies the process of integrating them with WordPress. For example, if you haven’t manually added Google Analytics to your site yet, Site Kit can help you add the tracking code.

Once your services are integrated, Site Kit also provides access to key metrics from the WordPress dashboard. For instance, with Google Analytics, you can see your overall traffic, impressions, clicks, and goals.

While you don’t need a plugin to connect any of these services to your WordPress site, Site Kit makes the process much easier. In most cases, all you have to do is click a few buttons to grant permissions.

How to use Google Site Kit with WordPress (in 4 steps)

To truly understand the value that Google Site Kit provides to WordPress users, it helps to see it in action. Here’s how to set it up and make it work for your site in a few easy steps.

Step 1: Install and activate Google Site Kit

Installing and activating Google Site Kit works just like any other WordPress plugin. Once activated, it will prompt you to proceed with the setup process:

Step 1- Install and activate Google Site Kit

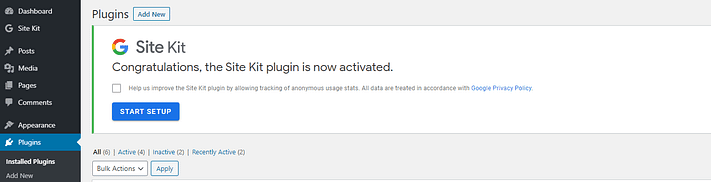
Click the Start Setup button to continue.

Step 2: Verify ownership of your website and connect Search Console

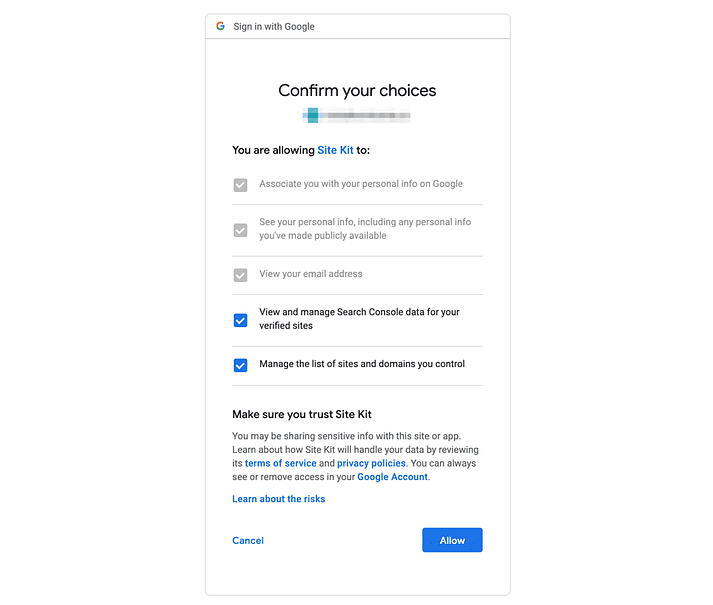
After starting the setup wizard, Site Kit will ask you to log in with your Google account to verify ownership of your WordPress website:

Step 2- Verify your website ownership and connect Search Console

You’ll need to grant a few permissions to allow Site Kit access to key data about your site and your Google account. Click Allow for each prompt to continue:

Connecting to a Google Account

If you’ve already connected your WordPress site to Search Console, at this point, Google Site Kit will automatically integrate it. Otherwise, you’ll be prompted to set it up:

Google Site Kit - Automatic integration

Click the Add site button, and Google will take care of the rest. You’ll be ready to use the plugin afterwards:

Google Site Kit - Add a site

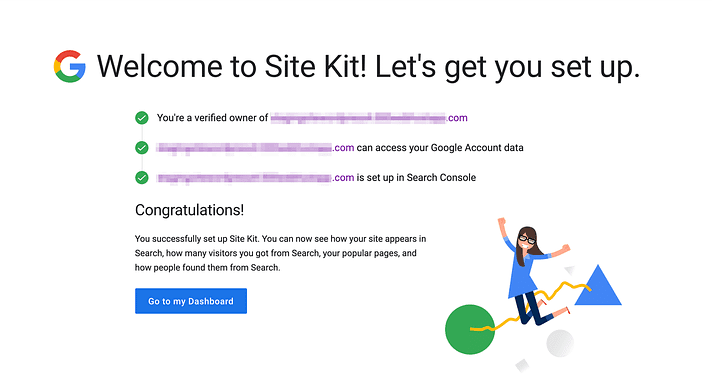
That’s it for the basic setup process.

Step 3: Integrate your preferred Google services

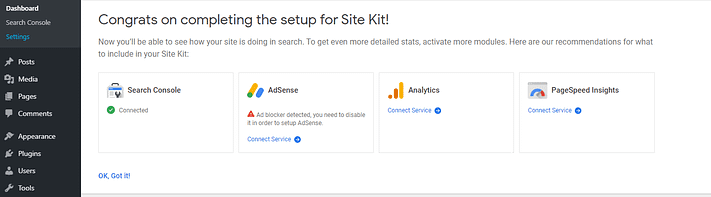
While Google Site Kit requires integrating Search Console with WordPress, after completing the setup wizard, you can customise which services you want to add. The plugin immediately provides links to connect AdSense, Analytics, and PageSpeed Insights:

Search Console integration with WordPress

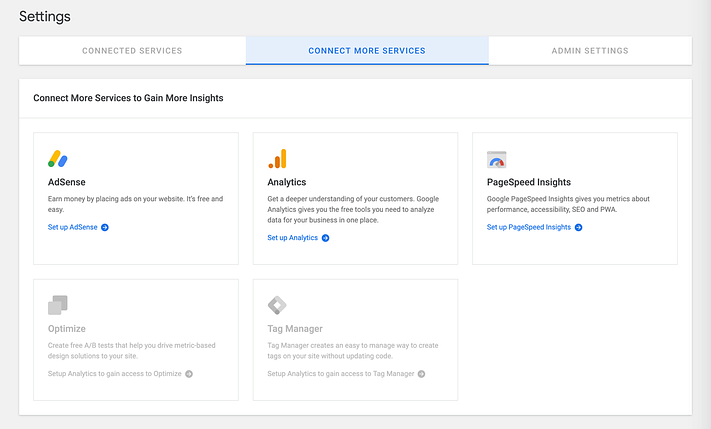
If you prefer to wait to set up additional services, you can always do it later by going to Site Kit > Settings > Connect More Services:

Linking Google Site kit accounts

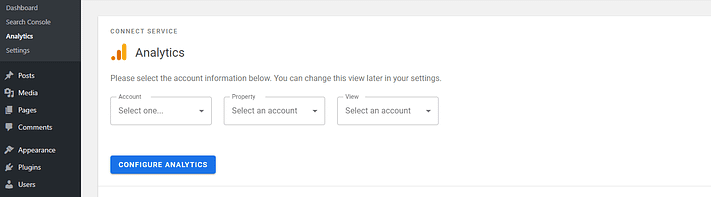
For each additional service, you’ll need to confirm which account you want to use and grant a list of permissions for Site Kit. If needed, you can also connect your site to new tools directly from your dashboard:

Google Analytics configuration

It takes only a few clicks and is much faster than manually adding tracking codes.

Step 4: View your dashboard and reports

Google Site Kit displays data in several ways. First, you can see an overall summary of all your services from Site Kit > Dashboard.

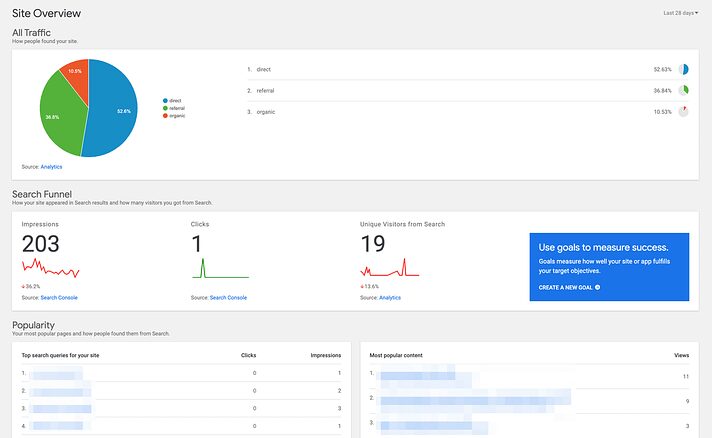
For services like Search Console and Google Analytics, Site Kit needs to gather data for some time before showing any numbers. We went ahead and connected PageSpeed Insights to show you how it displays results in its management dashboard:

After some time, your management dashboard may look something like this:

Google Site Kite Dashboard

Another option is to view individual reports for your services. Each will have its own section under Site Kit in the WordPress sidebar. These summaries give you a bit more detail than the management dashboard:

Analytics Google Site Kit

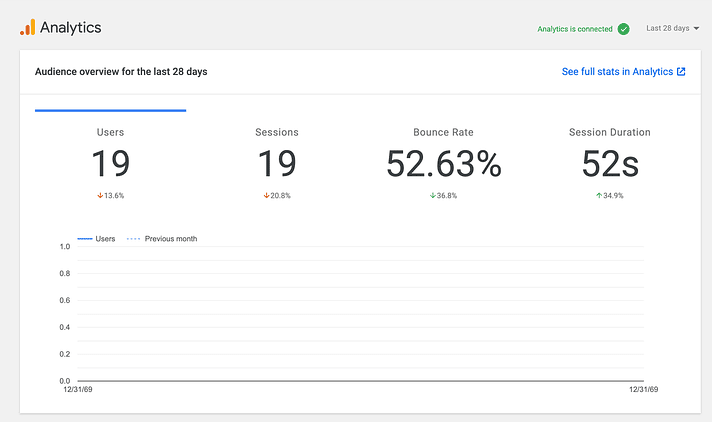
You can also filter by specific pages on your site, such as only seeing statistics for a particular blog post or testing the page speed of a specific page.

You’ll also get a new Site Kit option in the WordPress admin bar. You can use this from the front end of your site to see Google Analytics stats for the part of the content you’re currently viewing:

That’s all for using Google Site Kit for WordPress.

Is it worth using Google Site Kit for your website?

In general, there aren’t many downsides to using Google Site Kit for WordPress. It might be a bit overwhelming if you plan to connect only one Google service.

However, if you intend to leverage multiple services, Site Kit is a significant time-saver. Moreover, integration couldn’t be easier. In the case of PageSpeed Insights, for instance, it takes just one click.

Another positive aspect is that Site Kit doesn’t force you to connect more services at once. If you want to use only Search Console, for example, you can do so without annoying pop-ups in your dashboard recommending Analytics.

Furthermore, Site Kit doesn’t slow down your loading time – it adds no new content to the front end of your site apart from the essential scripts required for the service to function (such as the Google Analytics tracking script, which would still be present even if you manually connected Google Analytics to WordPress).

One drawback of using Site Kit is that it doesn’t provide configuration options for the services you connect. Navigating to Site Kit > Settings will show you if the plugin is working and give you the option to send tracking data to Google, but that’s about it.

Google Site Kit Settings

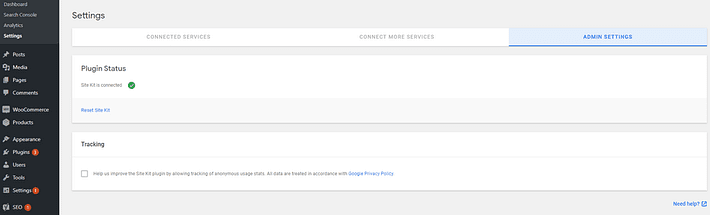
This can be expected, as adding individual settings for so many services has the potential to be overwhelming. However, if you are using any of these tools for the first time, the lack of options can be confusing. You will need to visit each service separately to personalise your settings.

Conclusion

If you are looking to integrate webmaster services with your website, Google Site Kit for WordPress dramatically simplifies the process. During our review, we successfully connected all the tools we wanted within minutes with the help of simple prompts.

Overall, Site Kit can be a valuable addition to your arsenal of WordPress plugins, especially if you use multiple services. However, it does not replace the need to occasionally visit the actual website for each service. For example, while you can glance at your key Google Analytics metrics from the WordPress dashboard, you’ll still need to use the Google Analytics dashboard to access all the information.

If you found this helpful, check out the Loco Translate guide here.

Victoria Pencheva
About the author
Call Now Button