
Enhancing rich snippets and schema markup on your WordPress website adds that “extra individuality” that makes it stand out in Google Search Engine Results Pages (SERP). You may have seen Google results with stars for review ratings, prices, product specifications, or recipe information. These visual cues in Google often increase your chances of being clicked, leading to improved traffic and conversion rates.
For many, it may seem challenging, but we will show you how to do it quickly and easily, ensuring more traffic and a place among the best.
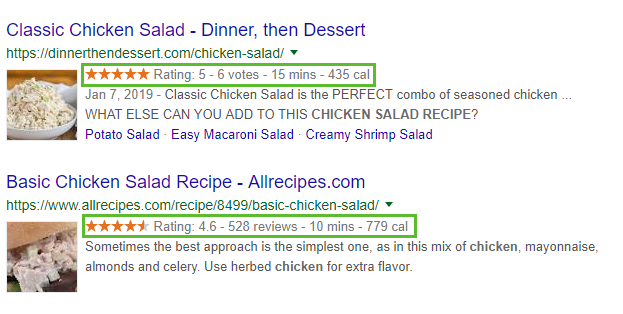
You’ve probably seen it when you search on Google—some links display star ratings. This is one example of a rich snippet.
To present better results, rich snippets enable users to easily find the information they are looking for. When your website appears in searches like Google, and rich snippets are added, Google can show additional information about the actual result.

It’s important to note that adding rich snippets to your website doesn’t automatically mean higher rankings in search engines. However, it helps your website stand out, increasing the chances that many people will browse your page.
There are various types of rich snippets you can use, and here are some of the most common ones:
Review – Displays star ratings and who made the review, either from an individual reviewer or cumulative user reviews.

Video – Can be used to indicate duration, license, production company, and/or the creator of the video clip.

Recipe – Includes nutritional information such as serving size, calories, fat content, and more.
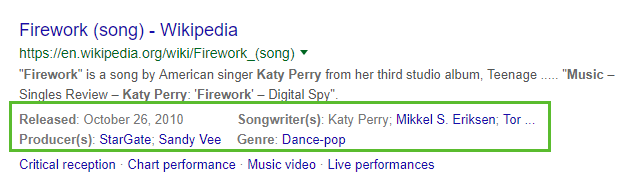
Music – Includes information about the music, such as album release date, duration, genre, and producer.
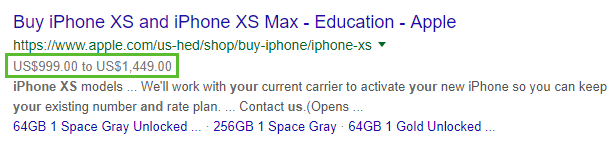
Product – One of the most popular searches, especially in e-commerce. It includes essential product information like price or an image of the product.
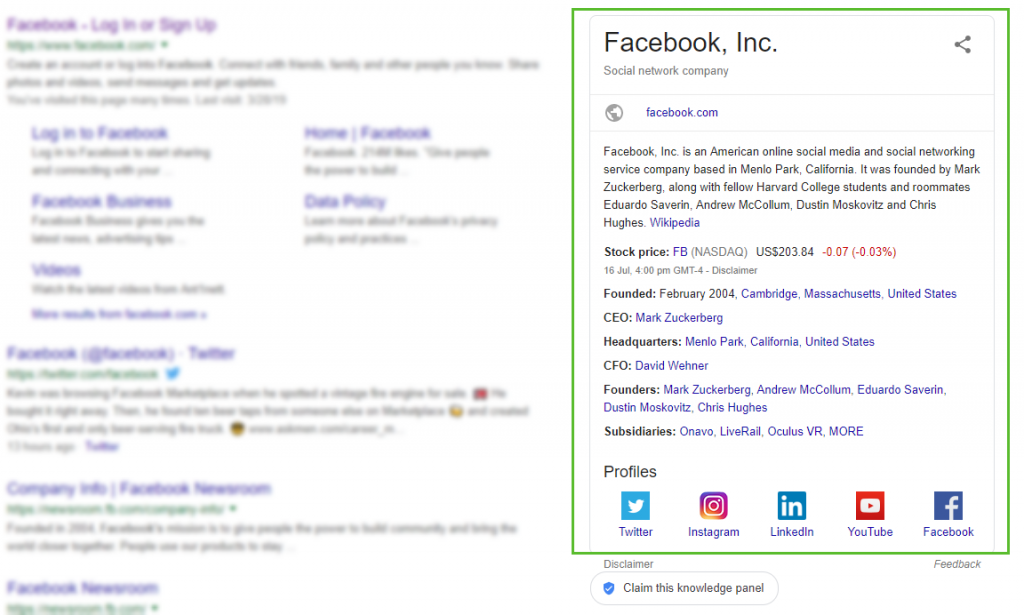
Business and organisation – Includes available properties like the company name, address (physical and URL), phone number, geolocation (latitude and longitude), and logo.
Top stories – This is the “Top stories” section in search results, but you can only see this when Google News approves the website

In addition to these, you can also add events, job postings, course lists, books, articles, and many more. In summary, rich snippets can help you get more clicks and improve your ranking.
Schema Markup is one of the reasons Google produces such useful results. It’s one of the latest forms of optimization and is considered one of the most dominant forms of SEO. It can enhance your website’s effectiveness in SERP as it acts as code behind the scenes, helping Google create rich snippets.
Schema Markup also assists with other visibility functions in search, such as:
- Site links – These are additional links in search results if someone is searching for your website.
- Breadcrumbs – Instead of displaying your raw URL, Google shows breadcrumbs.
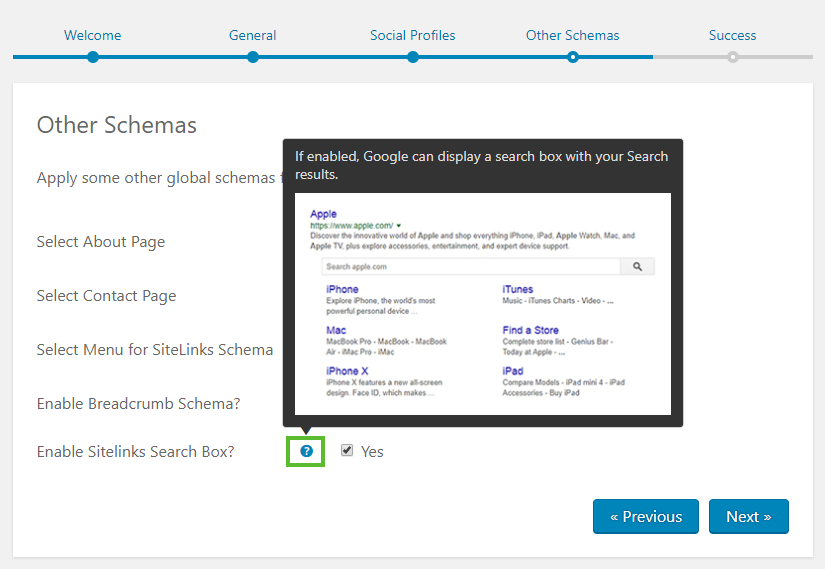
- Search box site links – allows people to search within your website from the Google search results page.
As mentioned earlier, adding rich snippets and Schema Markup doesn’t take much time if you use the right tool. Some plugins can help you with this, but I can say that Schema Pro is the best one to rely on.

What makes it an excellent plugin for automating your schema markup?
- User-friendly interface, so it works well even if you’re not a technology expert.
- Allows you to map existing content and add code to data fields.
- Works behind the scenes and uses the JSON-LD format recommended by Google when adding schema.
- Create schema markup just once, and Schema Pro will automatically insert codes into other relevant posts and pages.
Schema Pro costs $79 per year or $249 for lifetime access. If you’re an agency, you can get it for $249 per year or $699 for lifetime access.
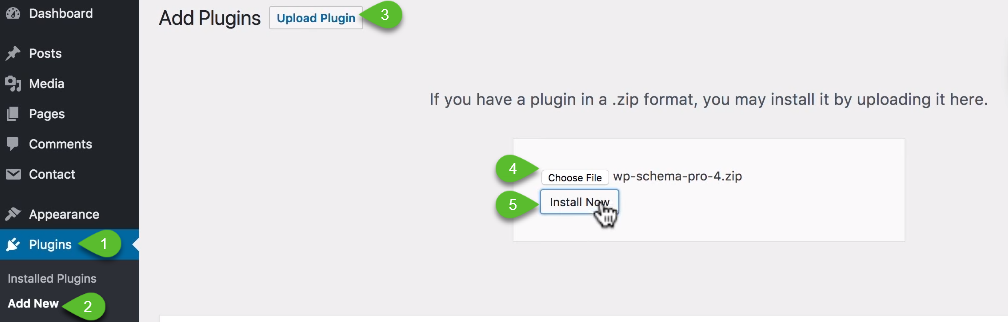
After downloading the Schema Pro plugin, go to your WordPress dashboard and click on “Add New ” from the plugins menu. Upload the Schema Pro plugin zip file, install, and activate it.
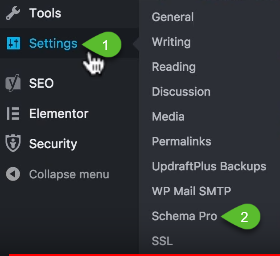
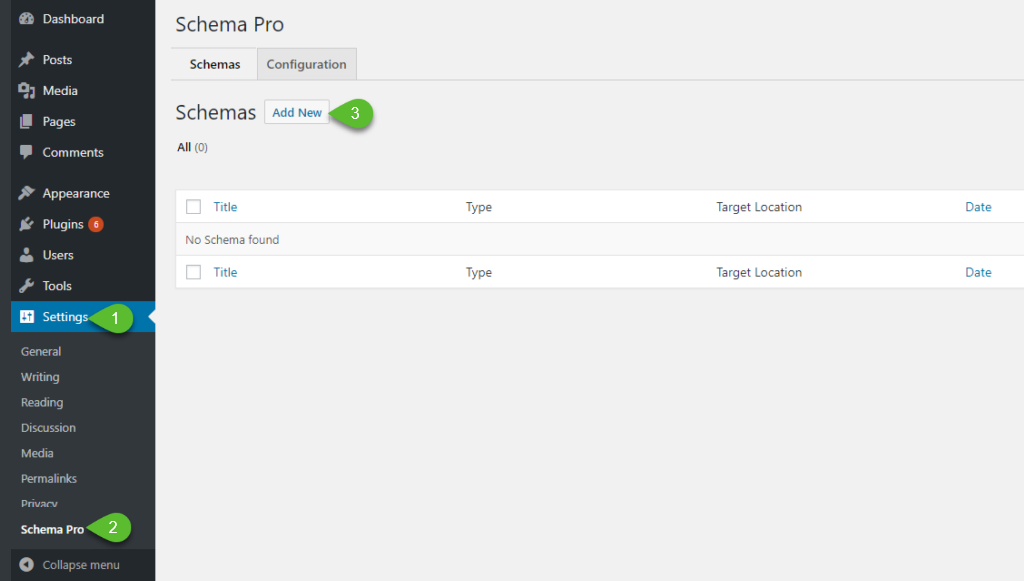
Go to the Settings menu, and you’ll find Schema Pro.
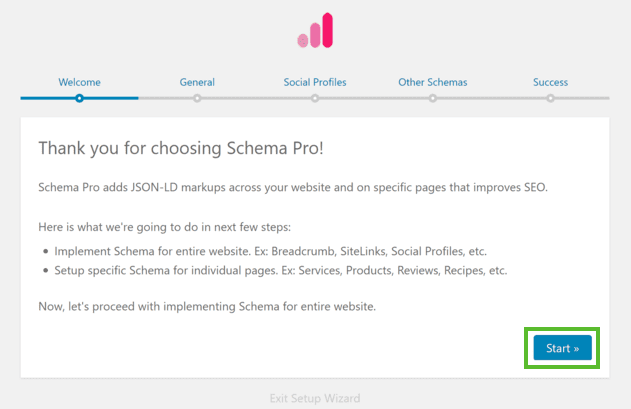
In the Configuration section, you’ll find the “Start Setup Wizard” button, where you can configure basic information about your website.
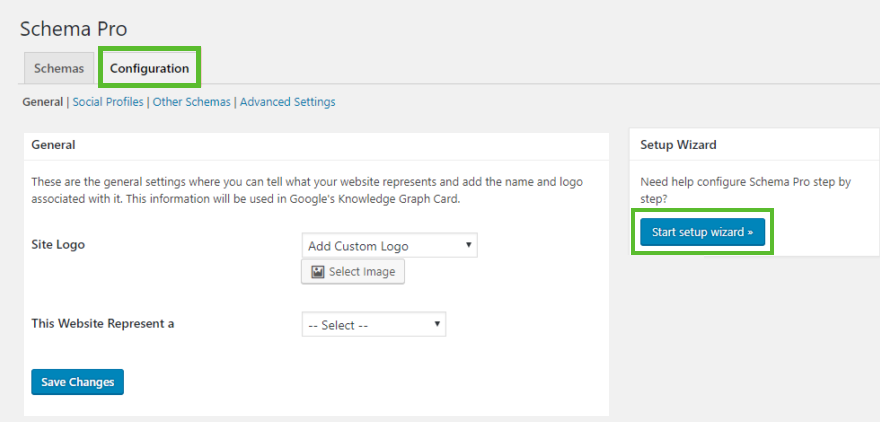
To begin setup, click on the “Start” button.
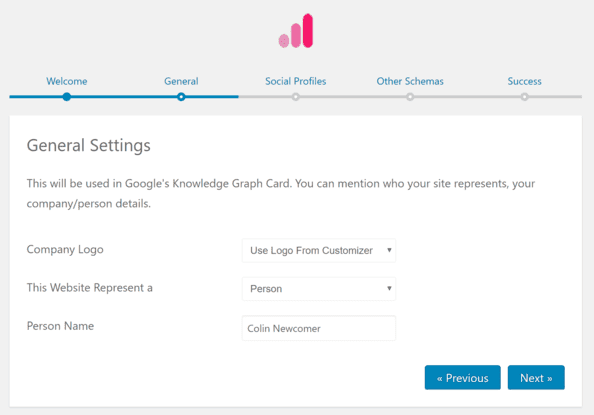
Select your logo and specify whether your website represents a company or an individual. Then click “Next.”
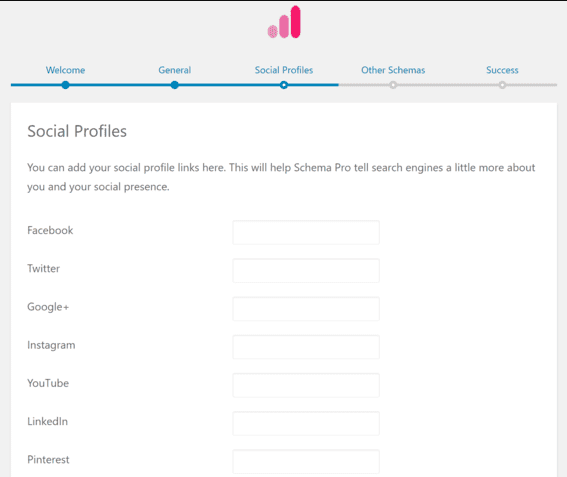
Connect your social media profiles to your website. Click “Next.”
Configure settings for breadcrumbs, site links, search box site links, and on which pages you want to apply the schema. I recommend activating all features. Click “Next.”
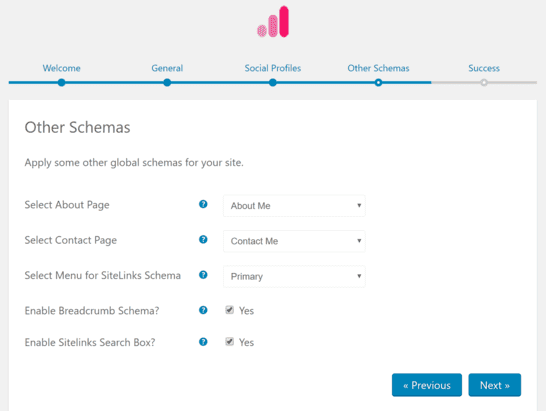
If you encounter difficulties, you can click on the question mark icon [?] for more instructions.
Now it’s time to add your schema.
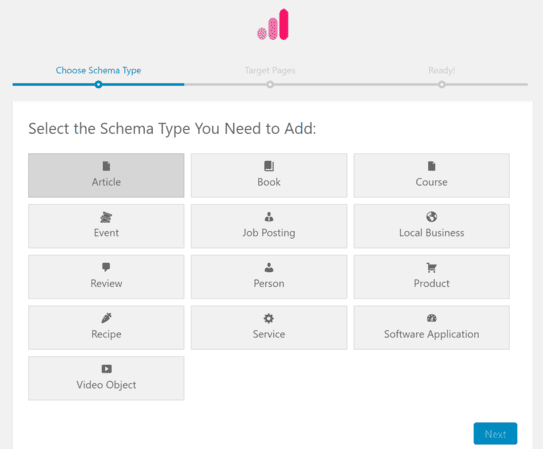
Schema Pro supports 13 primary schema types and continues to add new ones. The schema information you can add depends on the type of schema you’ve chosen.
For example, if you choose a recipe schema type, you can add calories, preparation time, cooking time, category, recipe yield, and so on.
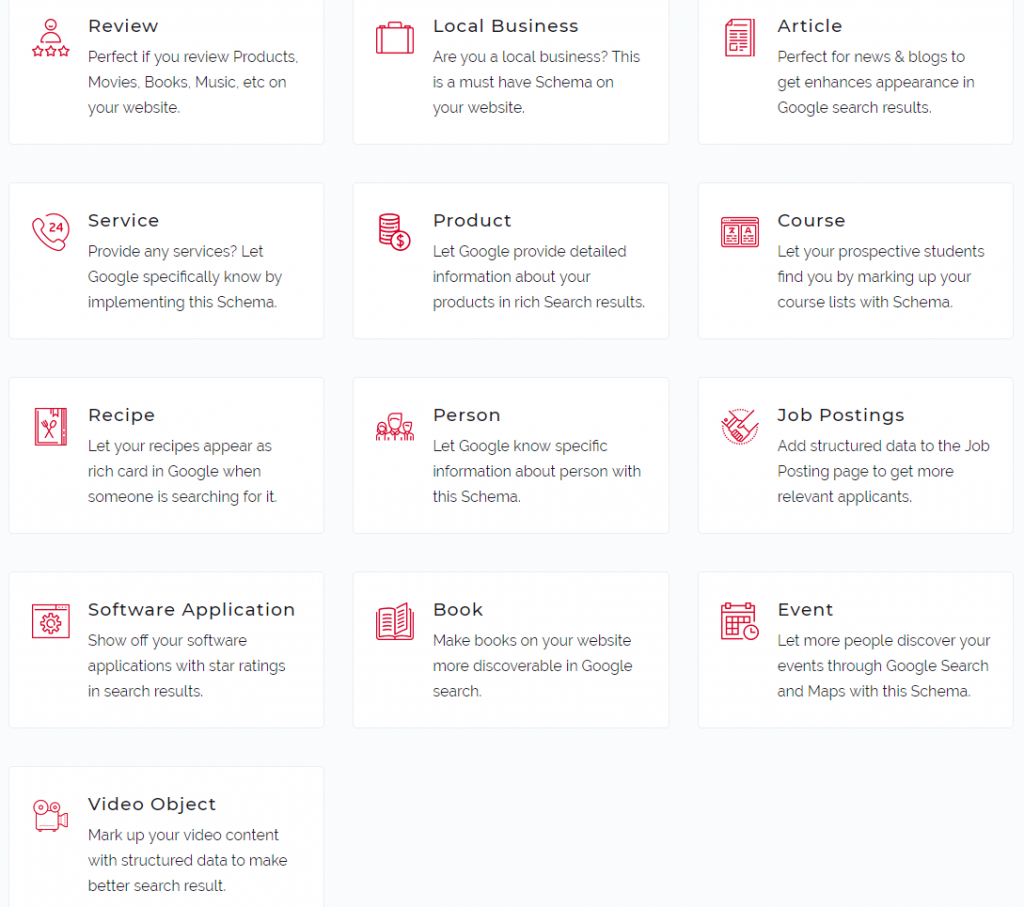
If you choose a job posting schema type, you can add a title, publication date, job type, location, salary, and other related information.
Most bloggers could also benefit from using the character schema type.
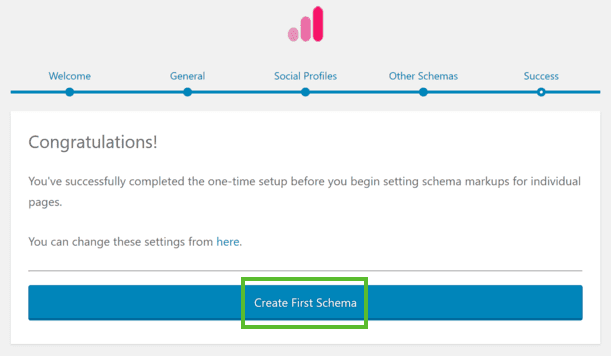
If you’re creating a schema for the first time, you can click on the “Create First Schema” button or go to Schema Pro in the settings menu. In the Schema section, click on “Add New.”
Choose the schema type. Then click “Next.”
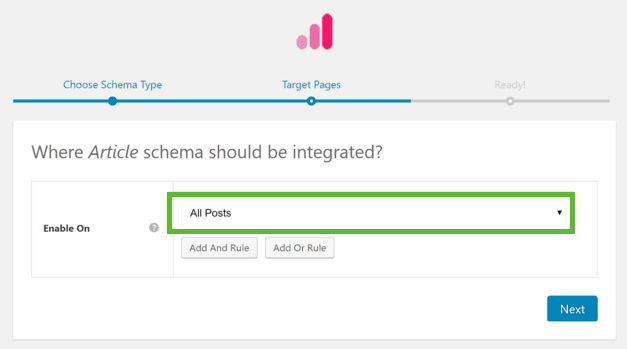
Select the content to which you want to apply the schema type. You can also add “AND” and “OR” rules. Click “Next.”
And you’re ready!
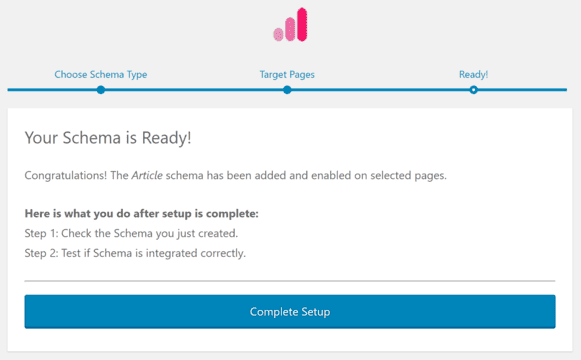
As mentioned, the information you can add depends on the schema type you choose. So, on the next screen, you’ll find all the relevant information for it, and Schema Pro will automatically match this information with your WordPress website.
In our example, the schema type is for an author. So, Schema Pro maps the author’s name as the WordPress author’s name and the publication date as the WordPress publication date.

If you want to manually adjust things, you can do so using custom fields and mapping the information with schema markup. Then, you can select that information from the dropdown menu.
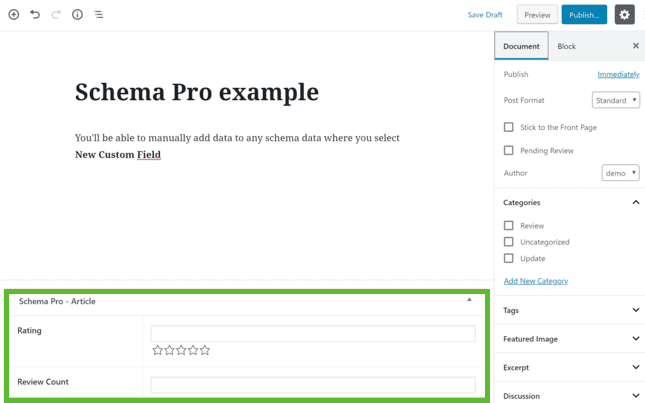
Speaking of custom fields, there are cases where Schema Pro may not find the necessary information to be mapped with schema markup. For instance, in the Article schema type, there are schema markings for ratings and the number of reviews, but this data is not available by default in your WordPress post or page.
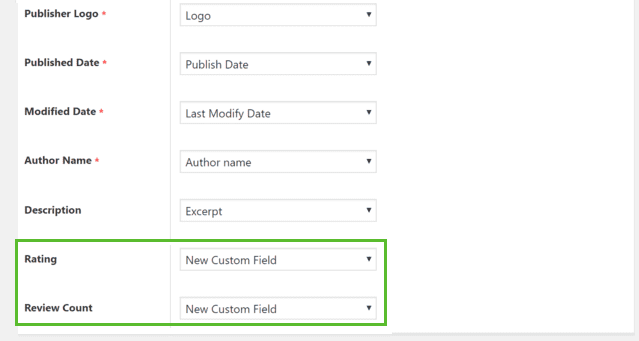
What Schema Pro does is add new custom fields under the WordPress editor, so you can fill them in, although it’s not mandatory.
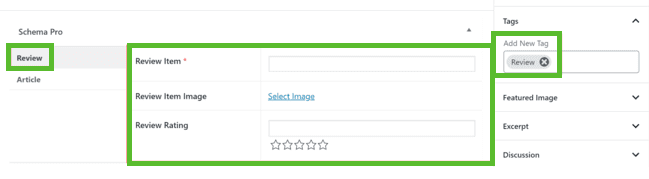
If you’re creating more specific content, like a product review (not just a general article), you might want to use the review schema type. You can simply go back to the Schema Pro setup wizard and add the review schema type.
The idea here is that instead of enabling it for all posts, you can enable it for specific pages/posts/archives, etc.
You can either enable it for a specific post by searching for its name and manually adding new posts in the future, or to a specific tag or category.
For example, you can add a tag or category called “Review” to which you can apply the review schema type.
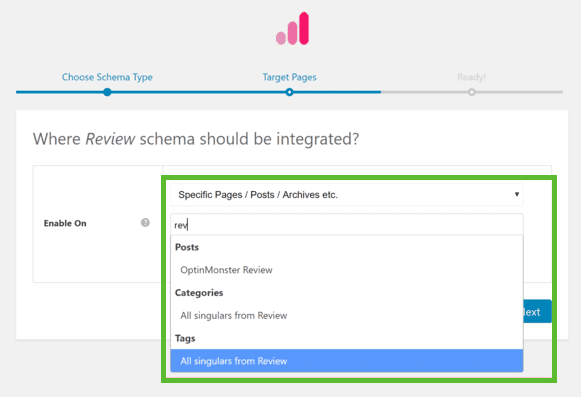
So, if you create a post and set its tag or category as “Review,” the Schema Pro section under the WordPress editor will show the review schema type.
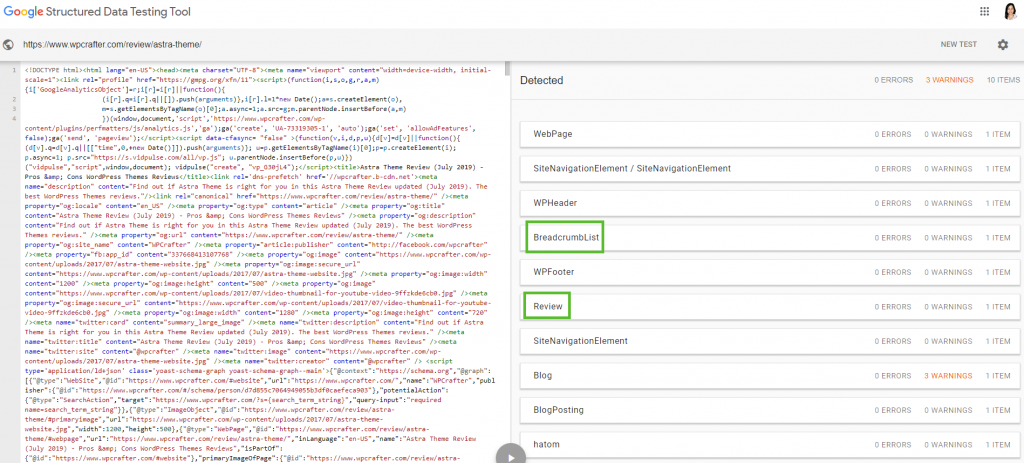
After setup and configuration, you need to make sure everything is set up correctly. Testing might seem challenging, but Google provides its best set of tools for validation called the Structured Data Testing Tool.
This tool checks and detects if schema markup is present on your website and helps you verify if there is any error in the configuration.
Simply go to the tool and enter the URL of your content. Click the “Run Test” button, and Google will determine if your schema markup is present.
Once Google confirms that your schema markup is present, it means you are ready, as Google has everything it needs to create rich snippets for your website.
Adding rich snippets and schema markup to your WordPress website might seem a bit complex, especially if you are not a technology expert. However, with the right plugin, the process can be straightforward and effective.
The Schema Pro plugin stands out as a tool that is user-friendly and one of the best when it comes to adding rich snippets and automatic schema markup. It works on 99% of the things you need for an enhanced user experience. Simply configure a few settings, manually add some information in the custom fields, and you’re ready to go.
So, if you want your website to stand out on the search results page and increase your click-through rates, you can take advantage of the benefits of rich snippets and schema markup.