Optimising images for websites

Optimising images for websites
Optimising images in a website with 40% of the original size

Understanding the basics of image optimsation gives your content the best chance for SEO success. The reason is that images not only make your content more accessible, engaging, and appealing to users but also to search engines.

What is image optimisation?

Image optimisation involves creating and delivering high-quality images in the ideal format, size, and resolution to enhance user engagement. It also includes accurately labeling images with metadata so that search engine bots can read them and understand the context of the page.

The use of images has increased in recent years, consuming more bytes than any other part of a website. Thus, the size and complexity of images have a significant impact on a site’s performance. When you can reduce the size of images without compromising quality, it improves page load times and the overall user experience. This can have a positive impact on search engine rankings, further enhancing customer engagement, conversions, and customer retention.

What is the benefit of optimisation?

Let’s look at a few practical examples of the optimisation we apply to a website or an online store.

Testing with a banner optimised through design programs.

I created a banner with dimensions 1200 x 500 px and saved it in different formats, respectively from Adobe Photoshop and Adobe Illustrator.

Different size of a banner 1200 x 500 px saved in different file formats from Abode Photoshop and Illustrator

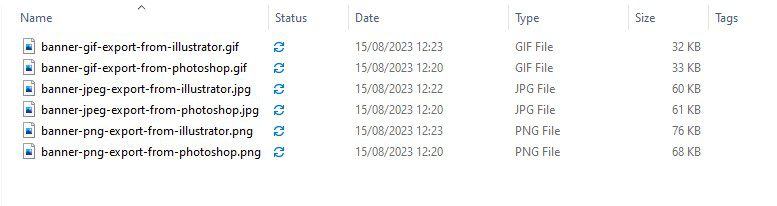
As you can see, there isn’t much difference between the two programs, and the difference comes from the file format that will be used.

Test with a 1600 x 1200 px image optimized using online tools.

Test with a 1600 x 1200 px image optimised using online tools.

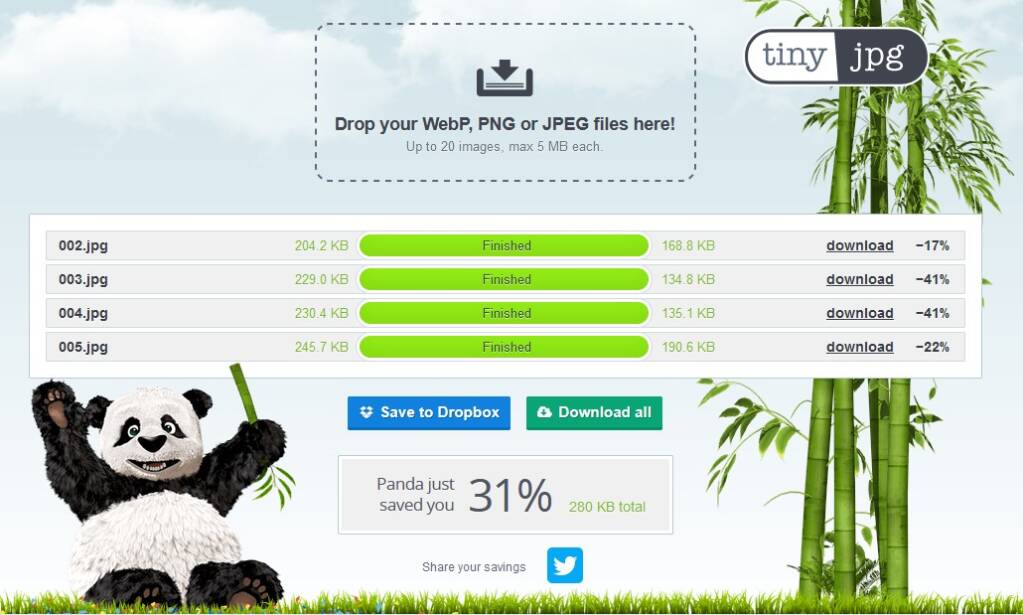
Online optimization tools are used – cloudconvert.com and tinyjpg.com

Test for optimisation of an images in different format and platforms

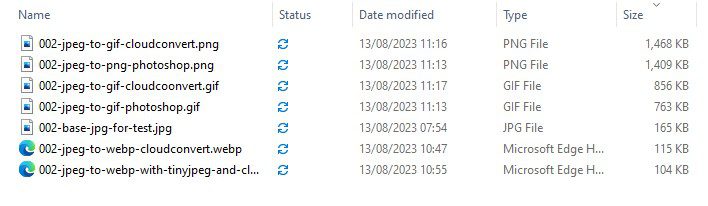
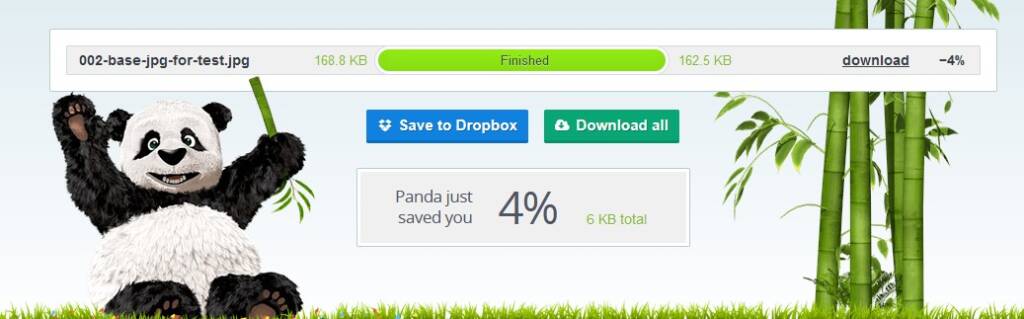
The basic file size is 165 KB. When optimized in different formats like GIF and PNG, the sizes increase significantly. If we optimise only the size within the same format, it results in a 4% reduction in size. However, if we convert it through both tools, first for size optimization and then to webp, we can achieve a difference of 40%, reducing the size to 104 KB.

Basic optimisation of a jpeg file with tinyjpeg.com

Here are a few more tests with different images.

Test of more images for size optimisation

Here’s the final result using both tools.

Results of image optimisation

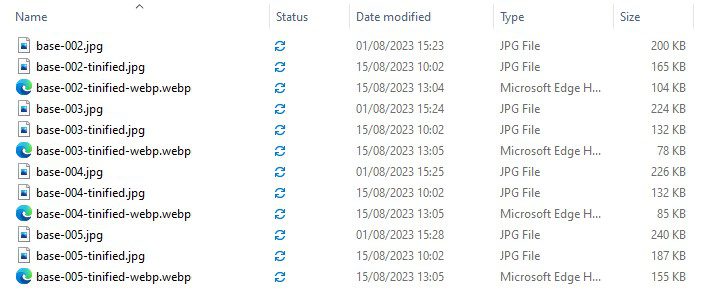
As you can see, starting with a total size of 890 KB, if we optimise only the size, it reduces to 614 KB. However, if we also change the format, we save almost 50%, resulting in a final size of 420 KB.

Manual image optimisation

Manual image optimization can be done:

However, these methods are more suitable for smaller image volumes and articles. For larger-scale optimization, you may want to consider additional recommendations to ensure that your images are well-optimized.

Change the image size

Changing the size of an image is important for optimizing it for the web. While image size refers to the dimensions of the image (e.g., 1024 pixels by 680 pixels), the file size relates to the storage space it occupies (e.g., 350 KB). Images with higher resolution and larger dimensions significantly slow down webpage loading times. While they work well for printed materials, they should be resized and dimensioned appropriately for websites to ensure optimal performance and user experience.

Use modern web formats

Using modern web formats is crucial for image optimization. Each format, such as PNG, JPEG, GIF, and WEBP, has its advantages. We recommend using WEBP for optimizing images with many colors and PNG for simple images. The best image formats for the web are WEBP, PNG, JPEG, SVG, and GIF.

Compress effectively

Efficient compression is essential for image optimization. How well an image is compressed affects both the file size and quality. Smaller files often come at the expense of image quality.


Experiment with different file types and compression levels to find what works best for each image. Many image editing tools, such as Adobe Photoshop, offer a “Save for Web” option that automatically reduces the file size while optimizing image quality. Balancing compression with quality is crucial to achieve the best results for your website.

Use alt tags

Users may understand the image, but search engine bots require clues. Without alternative text, search engines cannot index your image accurately.

A good alt tag provides context and also assists users with visual impairments. It’s also helpful when issues prevent the image from loading, as search engines can read the alternative text to inform ranking of the page. Write alt tags in more detail than the file name. This is also crucial for image optimization.

Relevant brand terms can be included in alt tags to improve visibility, but avoid keyword stuffing.

Make images mobile-friendly.

Google’s algorithm prioritises mobile indexing, so bots primarily look at the mobile version of the website. Therefore, your images should be mobile-friendly. How do you optimize images for this? In short, ensure your images and website layout are responsive to the viewing device.

While some templates and website builders automatically resize images, you can specify the image size based on the device’s width. To do this, add some custom CSS code to your website.

Optimise images titles

WordPress typically uses the image title from the file name. However, if you’re not using WordPress or the title doesn’t describe the image, update it with relevant keywords in the same way you name the files.

Image titles are no less important for SEO and can provide additional context to the alternative text. Image titles are more useful for user engagement, so consider adding a short call to action like “buy now” or “download today.”

Image optimisation plugins

  • Smush – It automatically compresses, optimizes, and reduces the size of images without significant loss of quality. When you add an image to your website, Smush processes and optimizes it by removing unnecessary information and metadata that can increase file size.
  • ImageMagick Engine, on the other hand, automatically resizes images to the required dimensions for your site. You can configure it for different formats and their respective sizes.
Victoria Pencheva
About the author
Facebook
LinkedIn
Pinterest
Skype
WhatsApp
Email
0 0 votes
Article Rating
Subscribe
Notify of
guest
0 Comments
Inline Feedbacks
View all comments

Similar articles

0
Would love your thoughts, please comment.x
()
x
Call Now Button